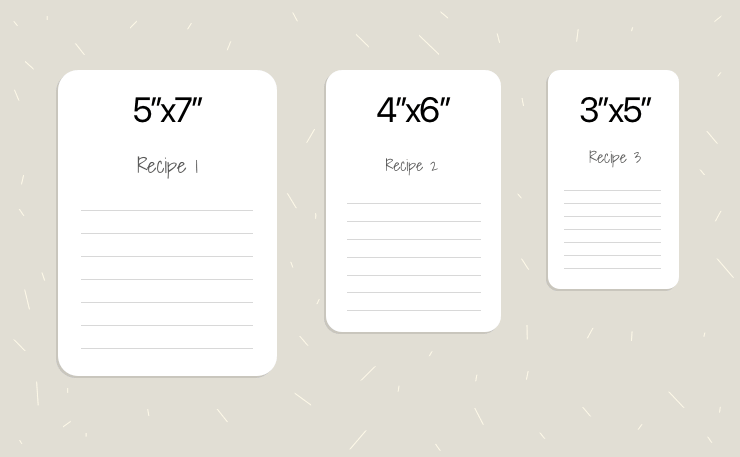
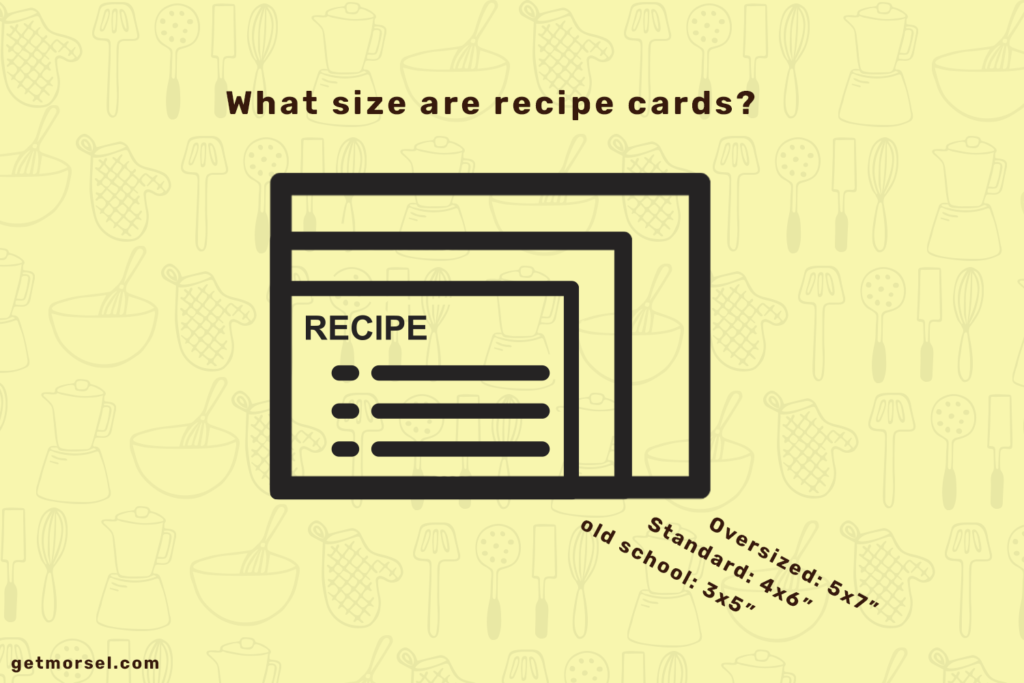
The most common recipe card sizes are 3 x 5 inches, 4 x 6 inches, and 5 x 7 inches. A 4 x 6 inch card is a practical choice for most home cooks because it offers room for ingredients, steps, and notes without taking up too much storage space.
In American kitchens, recipe cards are a familiar way to save family meals, holiday dishes, and everyday favorites. You might keep them in a small recipe box, tuck them into a binder, or print them at home for a new collection. The right size makes these cards easier to read, handle, and store.
The best size of recipe cards depends on how much you write and where you plan to keep them. A short recipe may fit well on a 3 x 5 inch card, while a dish with many steps may need a larger format. Before you print a stack, check the card dimensions, printer settings, paper size, and storage space.
Recipe cards do not have one required size. In the United States, 3 x 5 inches, 4 x 6 inches, and 5 x 7 inches are common formats used for handwritten and printable recipes. The best option depends on the recipe, the paper you use, and the way you store your collection.
A card measuring 4 x 6 inches is a useful starting point for most home cooks. It gives you more writing space than a 3 x 5 inch card while staying compact enough for many recipe boxes and organizers. However, a storage box made for smaller cards may not hold this format.
The measurements refer to the finished card’s width and height, usually written as width by height. A 4 x 6 inch card in portrait orientation is 4 inches wide and 6 inches tall. Turn it sideways, and the same card becomes 6 inches wide and 4 inches tall.
Source: getmorsel.com
3 x 5 inches
A compact size for short recipes, basic ingredient lists, and small recipe boxes.
4 x 6 inches
A flexible middle size for everyday meals, ingredient lists, and step-by-step directions.
5 x 7 inches
A larger format for detailed recipes, larger handwriting, and extra cooking notes.
Are Recipe Card Sizes Standardized?
No single size applies to every recipe card. Retailers, stationery makers, template designers, and printer users may offer different dimensions. The word standard often describes a common format rather than a binding measurement that every maker must follow.
Check the actual dimensions listed by the seller or template creator. A card described as a 4 x 6 may not fit your box if the inside space is smaller than expected, especially when the box has tight corners or a fitted lid.
Check the listed dimensions
Use the measurements in inches rather than relying on a product title or a photo.
Measure the storage space
Measure the inside width and depth of the box, not just its outer size.
Recipe Card Size Chart in Inches and Centimeters
A size chart helps you compare the main formats before you buy paper or create a printable design. The table below shows the nominal dimensions and their approximate metric equivalents. These conversions are rounded to two decimal places where needed.
The dimensions describe the finished card, not the full sheet of paper used to print it. A printer may need extra space around the design, and cutting can change the final result slightly. For a close fit in a box, measure the finished card after printing.
Source: i.etsystatic.com
Common Recipe Card Dimensions
Use this comparison to narrow down the size that fits your needs. The storage and writing descriptions are practical guidelines, not strict rules.
3 x 5 inches
7.62 x 12.70 cm. Compact and easy to store, but space is limited for long recipes.
4 x 6 inches
10.16 x 15.24 cm. A balanced option for many everyday recipes.
5 x 7 inches
12.70 x 17.78 cm. Offers more room for large text and detailed directions.
How to Choose Between the Three Sizes
Start with the longest recipe you plan to write. If the ingredient list and directions fit comfortably on a 3 x 5 inch card, a smaller format may be enough. If you often record oven settings, preparation times, substitutions, and serving notes, a 4 x 6 or 5 x 7 inch card gives you more room.
Next, think about how often you will use the card. A compact card is easy to flip through in a small box. A larger card is easier to read from a short distance, though it may take up more counter and storage space.
Choose 3 x 5 for compact storage
Best when your recipes are short and your existing recipe box uses this size.
Choose 4 x 6 for general use
A practical middle ground for a varied collection of family recipes.
Choose 5 x 7 for more detail
Useful when recipes need several steps, extra notes, or larger lettering.
Which Recipe Card Size Is Best for Different Uses?
The right recipe card size depends on the way you cook and the details you need to save. A short sauce recipe has different needs from a holiday meal with several stages and serving notes. Think about the content first, then choose a format that holds it without cramped writing.
There is no need to use one size for every purpose. You can keep short recipes on smaller cards and use larger cards for baked goods, family dishes, or recipes with many steps. Just make sure each size has a clear place in your storage system.
Source: i.etsystatic.com
For a small recipe box
Use the size that fits the box’s interior. A 3 x 5 inch card may suit a compact box, while larger boxes may accept 4 x 6 inch cards.
For daily cooking
A 4 x 6 inch card often gives enough room for ingredients and directions while remaining easy to handle.
For detailed family recipes
A 5 x 7 inch card can make it easier to record several steps, cooking times, and notes about serving.
For gifts and keepsakes
Choose a size that suits the presentation and leaves enough room for clear handwriting or a printed design.
Best Size for Handwritten Recipes
For handwritten recipes, choose a card based on your handwriting and the length of the instructions. A 3 x 5 inch card can work well for a simple salad dressing, a basic drink, or a short list of ingredients. Longer directions may become crowded if you use large letters.
A 4 x 6 inch card offers more space for notes such as oven temperature, cooking time, and serving size. If you prefer large handwriting or want to leave room for future changes, a 5 x 7 inch card may be more comfortable.
Leave room between lines
A little space makes ingredient amounts and cooking steps easier to read at a glance.
Use a clear layout
Keep ingredients in one section and directions in another so you can find details while cooking.
Best Size for Baking Recipes
Baking recipes can need more space because exact amounts, oven temperatures, pan sizes, and baking times all matter. A 4 x 6 inch card may work for a basic cookie recipe, but a 5 x 7 inch card can be easier to use for a cake with several steps or a recipe with frosting instructions.
Keep key details such as ingredient units and oven temperature easy to spot. If a recipe requires a separate filling or topping, make sure the card has enough space for both without squeezing the text.
Record exact amounts
Include units such as cups, teaspoons, ounces, or grams where needed.
Write the temperature, time, and pan size where they are easy to find.
Best Size for Printable Recipe Cards
Printable cards are useful when you want matching designs or several copies of the same recipe. A 4 x 6 inch template is a practical starting point, but the best choice depends on the available paper, printer, and final storage method.
A template may show several sizes, yet each version still needs the right page setup and print scale. Check the document dimensions before printing, and avoid stretching a small design to fill a larger card if the text or layout becomes distorted.
Match the template to the finished card
Select the exact width and height you plan to cut or print.
Print one sample first
Check the text, margins, and final size before printing a full set.
How to Pick the Right Size for Your Recipe Box
Measure your recipe box before choosing a card size. A card can look small enough in a product photo but still fail to fit once you account for the inside walls, dividers, and lid. The inside measurements matter more than the outside dimensions.
Use a ruler to measure the usable width and depth. If the box has a fixed card holder, check its opening too. Leave a little clearance so the cards can slide in and out without catching on the sides.
Source: i.etsystatic.com
Measure the interior
Record the usable width and depth of the storage area in inches.
Check the opening
Make sure the card can pass through the opening without bending.
Account for dividers
Check whether tabs or dividers reduce the space available for cards.
Test one card
Try a sample before buying a large pack or printing dozens of cards.
Will 4 x 6 Inch Cards Fit a 3 x 5 Inch Box?
Usually, a box designed for 3 x 5 inch cards will not hold 4 x 6 inch cards as intended. The larger card is one inch wider and one inch taller, so it needs more room in both directions when kept in portrait orientation.
Do not assume you can solve the problem by turning the card sideways. The new orientation changes which dimension faces the opening, but it does not reduce the card’s overall size. Measure the interior before making a change.
Keep the original card size
This is the simplest option if you want to keep using an existing box.
Choose a larger box
Use this option if you want more writing space and your collection can move to a new storage format.
How Much Space Should You Leave Around a Card?
A small amount of extra room helps cards move freely in a box. The exact clearance depends on the box shape and whether the cards have thick edges, protective sleeves, or decorative tabs. Test the fit with a few finished cards instead of relying on a universal clearance measurement.
Avoid a tight fit
Cards should slide out without catching on the sides or lid.
Check the full stack
A box that holds one card may still be too small for a thick stack.
How to Print Recipe Cards at Home
You can print recipe cards at home with a suitable template, paper, and printer. The main task is to keep the finished dimensions correct. A design that looks right on your computer may print too large or too small if the page setup or print scale is wrong.
Before you begin, check the card size, the paper size supported by your printer, and whether the template is set up for one card or several cards on a sheet. Some home printers do not accept small individual card stock, so printing on a larger sheet and cutting the cards may be easier.
Source: cdn11.bigcommerce.com
What you need
A recipe card template, a printer, suitable paper or card stock, a ruler, and a paper cutter or scissors.
What to check
Confirm the template dimensions, printer limits, paper orientation, print scale, and margins.
Step 1: Set the Correct Card Dimensions
Open your template in a document editor or design program that displays page dimensions. Set the finished card to the size you want, such as 4 x 6 inches. If the design is printed on a full sheet, arrange the card within the sheet instead of changing the sheet dimensions to the card size.
Check that the width and height use inches or the correct metric equivalents. A value entered in the wrong unit can make the card much larger or smaller than planned.
Confirm width and height
Check both measurements before adding text or images.
Use the correct orientation
Choose portrait or landscape based on how you want to arrange the recipe.
Step 2: Choose Paper and Set Up the Printer
Select paper that suits your printer and how you plan to use the card. Regular paper is easy to write on, while card stock can feel firmer in the hand. Check your printer manual for supported paper weights and sizes before loading thicker stock.
If you are printing several cards on a letter-size sheet, make sure the layout leaves room between the cards for cutting. A full sheet may fit multiple designs, but the exact number depends on the finished card dimensions and the margins your printer needs.
Check paper compatibility
Use only paper types and weights supported by your printer.
Review the sheet layout
Make sure the cards and cutting gaps fit inside the printable area.
Step 3: Check Print Scale and Margins
Look at the print dialog before sending the file. Options such as Fit to Page, Scale to Fit, or Shrink to Printable Area can change the size of your design. If you need exact dimensions, use the appropriate actual-size or 100 percent setting when the layout and printer support it.
A printer may not print to the very edge of the paper. Keep text and important details away from the edge unless your printer and paper setup support borderless printing. If the design includes a border, check that it will not be cut off.
Print at the intended scale
Avoid automatic resizing when it would change the required finished dimensions.
Keep text inside safe margins
Leave enough space to prevent words from being clipped during printing or trimming.
Step 4: Print a Test and Measure It
Print one sample on ordinary paper before using your final card stock. Measure the finished design with a ruler and compare it with your target dimensions. Check the width, height, text size, and position of the cutting lines.
If the sample is too small or too large, review the print scale and document settings. Make one adjustment at a time, then print another sample. Once the measurements are correct, print the full set and cut along the guides.
If the card is too small
Check whether the print dialog reduced the design to fit the sheet or printable area.
If the card is too large
Check the scale, page dimensions, and whether the software interpreted the units correctly.
If the edges are missing
Move the design inward or use a printer and paper combination that supports the required borderless layout.
How to Design a Recipe Card That Is Easy to Read
A good recipe card makes key details easy to find while you cook. Size matters, but layout matters too. A large card can still feel crowded when the text is packed together, while a smaller card can work well when the recipe is short and clearly arranged.
Start with the recipe name, then group the ingredients and directions into separate sections. Add the preparation time, cooking time, serving size, or oven temperature when these details help the reader make the dish. Skip decorative elements that take up space without adding useful information.
Source: i.pinimg.com
Use clear section labels
Separate ingredients, directions, and notes so the reader can scan the card quickly.
Keep the text readable
Choose a font size that remains clear when printed at the intended card dimensions.
Leave space around the text
Avoid placing words too close to the edge or cramming every line together.
Use decoration with care
Borders, colors, and small illustrations should support the recipe rather than crowd it.
Portrait or Landscape: Which Is Better?
Portrait orientation places the shorter side across the top and the longer side down the page. It can work well when you want a title followed by an ingredient list and numbered directions. Landscape orientation places the longer side across the top, giving you more width for two columns or a long ingredient line.
Neither orientation is best for every recipe. Try a portrait layout for a simple recipe with a vertical list of steps. Try landscape when you want ingredients on one side and directions on the other. Keep the same orientation across a set if you want the cards to look consistent.
Portrait
Useful for stacked sections and recipes with several short steps.
Landscape
Useful for two-column layouts and wide ingredient lists.
How Much Text Fits on a Recipe Card?
There is no fixed word limit for a recipe card. The amount of text depends on the font size, line spacing, margins, and layout. A card with a few ingredients and brief directions needs less space than one that includes several components and detailed preparation steps.
If the card becomes crowded, do not solve the problem by shrinking the text until it is hard to read. Move the recipe to a larger card, simplify nonessential wording without changing the method, or use a second card for additional steps. If you split a recipe, label both cards so they stay together.
Keep essential details
Do not remove ingredient amounts, temperatures, timing, or steps needed to make the dish correctly.
Use a second card when needed
A continuation card can help with long recipes while keeping the text clear.
Recipe Card Paper, Cutting, and Storage Tips
The paper and finish affect how a recipe card feels, how it handles, and how well it works with your pen or printer. Choose a material that suits your kitchen routine. A card that will be handled often may benefit from firmer paper, while a simple collection for a recipe box may work well on standard card stock.
Think about the finished card as a whole. The dimensions, paper thickness, cutting method, and storage system all affect how easy it is to use. A card that fits when empty may become awkward to store if you add thick protective sleeves or oversized divider tabs.
Source: kimschob.com
Paper
Choose a weight and surface that your printer supports and that works with your preferred pen.
Cutting
Use a ruler and suitable cutting tool to make clean, even edges.
Storage
Keep cards dry and use a box, binder, or folder that matches their dimensions.
Should You Use Card Stock or Regular Paper?
Card stock feels firmer than ordinary printer paper and can make a recipe card easier to handle. However, thicker paper is not automatically better. It must work with your printer, and some surfaces may not suit every pen or ink type.
Regular paper can be a sensible option for recipes that will be placed in a sleeve or binder. If you plan to write on both sides, test whether the ink shows through or smears. Check the paper manufacturer’s and printer manufacturer’s guidance before using a heavier material.
Use card stock for a firm card
Check the printer’s supported paper weight and feed path first.
Use regular paper for a simple insert
This may work well when the card will be kept in a protective sleeve.
How to Keep Recipe Cards Neat
Store cards away from spills, steam, and direct contact with wet kitchen surfaces. A box or binder helps keep the cards together, while sleeves can add a barrier against dirt. Do not assume a sleeve or coated card is waterproof unless the maker states that it is.
Sort your collection in a way that suits your cooking habits. You might group cards by meal, dish type, or family member. Add short labels to dividers so you can find a recipe without searching through every card.
Use simple categories
Group cards into sections such as breakfast, main dishes, sides, and desserts.
Keep a digital copy
Save a scan or photo of important family recipes in case a card is lost or damaged.
Frequently Asked Questions
Q
What is the most common size of recipe cards?
Common recipe card sizes include 3 x 5 inches, 4 x 6 inches, and 5 x 7 inches. A 4 x 6 inch card is a useful general-purpose option because it offers room for most everyday recipes while remaining compact. The best size still depends on your storage box and how much detail you need to write.
Q
Are recipe cards 3 x 5 or 4 x 6 inches?
Both sizes are used for recipe cards. A 3 x 5 inch card is smaller and suits short recipes or compact boxes. A 4 x 6 inch card provides more writing space and can be easier to read. Check your existing box before changing from one size to the other.
Q
What size should I use for printable recipe cards?
A 4 x 6 inch format is a practical starting point for printable recipe cards. Choose 3 x 5 inches for a compact design or 5 x 7 inches for a recipe with more details. Match the template to the intended finished dimensions, check your printer’s paper limits, and print a test before making the full set.
Q
Can I print 4 x 6 inch recipe cards on letter-size paper?
Yes, you can often arrange 4 x 6 inch designs on US letter-size paper, which measures 8.5 x 11 inches, then cut them out. The number that fits depends on the layout, gaps between cards, and printer margins. Test the arrangement before printing on your final paper.
Q
What size is best for handwritten family recipes?
A 4 x 6 inch card works well for many handwritten family recipes. It offers more room than a 3 x 5 inch card without being as large as a 5 x 7 inch card. If you use large handwriting or record detailed cooking notes, the larger size may be more comfortable.
Q
How do I know if a recipe card will fit my recipe box?
Measure the usable width and depth inside the box, then compare those measurements with the finished card size. Check the opening and any dividers as well. If the fit is close, test one card before buying a large pack.
Q
What paper weight is best for recipe cards?
There is no single paper weight that suits every printer and recipe card project. Card stock can make a firmer card, while regular paper can work for cards kept in sleeves or binders. Check your printer’s supported paper types and weights before choosing a material.
✦ Wrapping Up
Conclusion
The best size of recipe cards comes down to writing space, card storage, and how you plan to use each recipe. The common 3 x 5 inch, 4 x 6 inch, and 5 x 7 inch formats cover many needs, from short handwritten recipes to detailed cooking guides. A 4 x 6 inch card is a sensible place to start if you want one versatile size for everyday use.
Before you buy or print cards, measure your recipe box, choose a clear layout, and check the final dimensions. A single test card can help you catch problems with print scale, margins, and cutting before you make the whole batch.
💡 Key Takeaway
Choose 4 x 6 inches for a flexible everyday recipe card, 3 x 5 inches for compact storage, or 5 x 7 inches for detailed recipes. Measure your storage space and print one test card before making a full set.