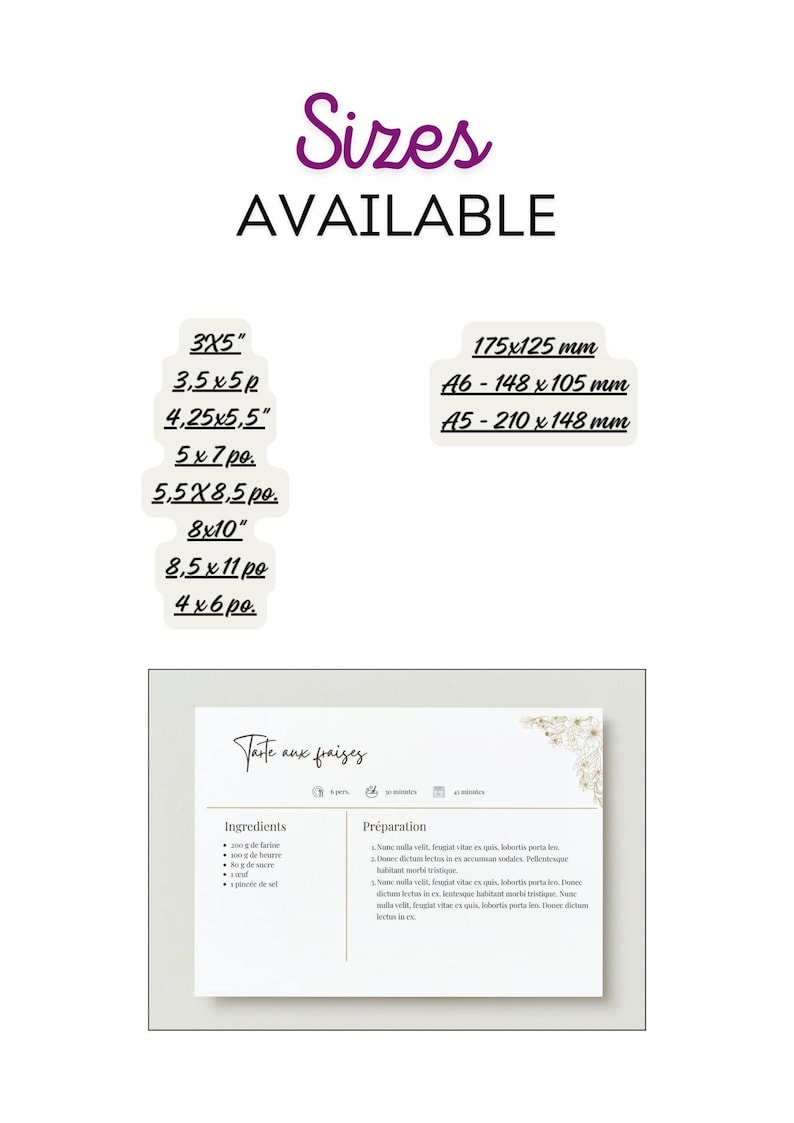
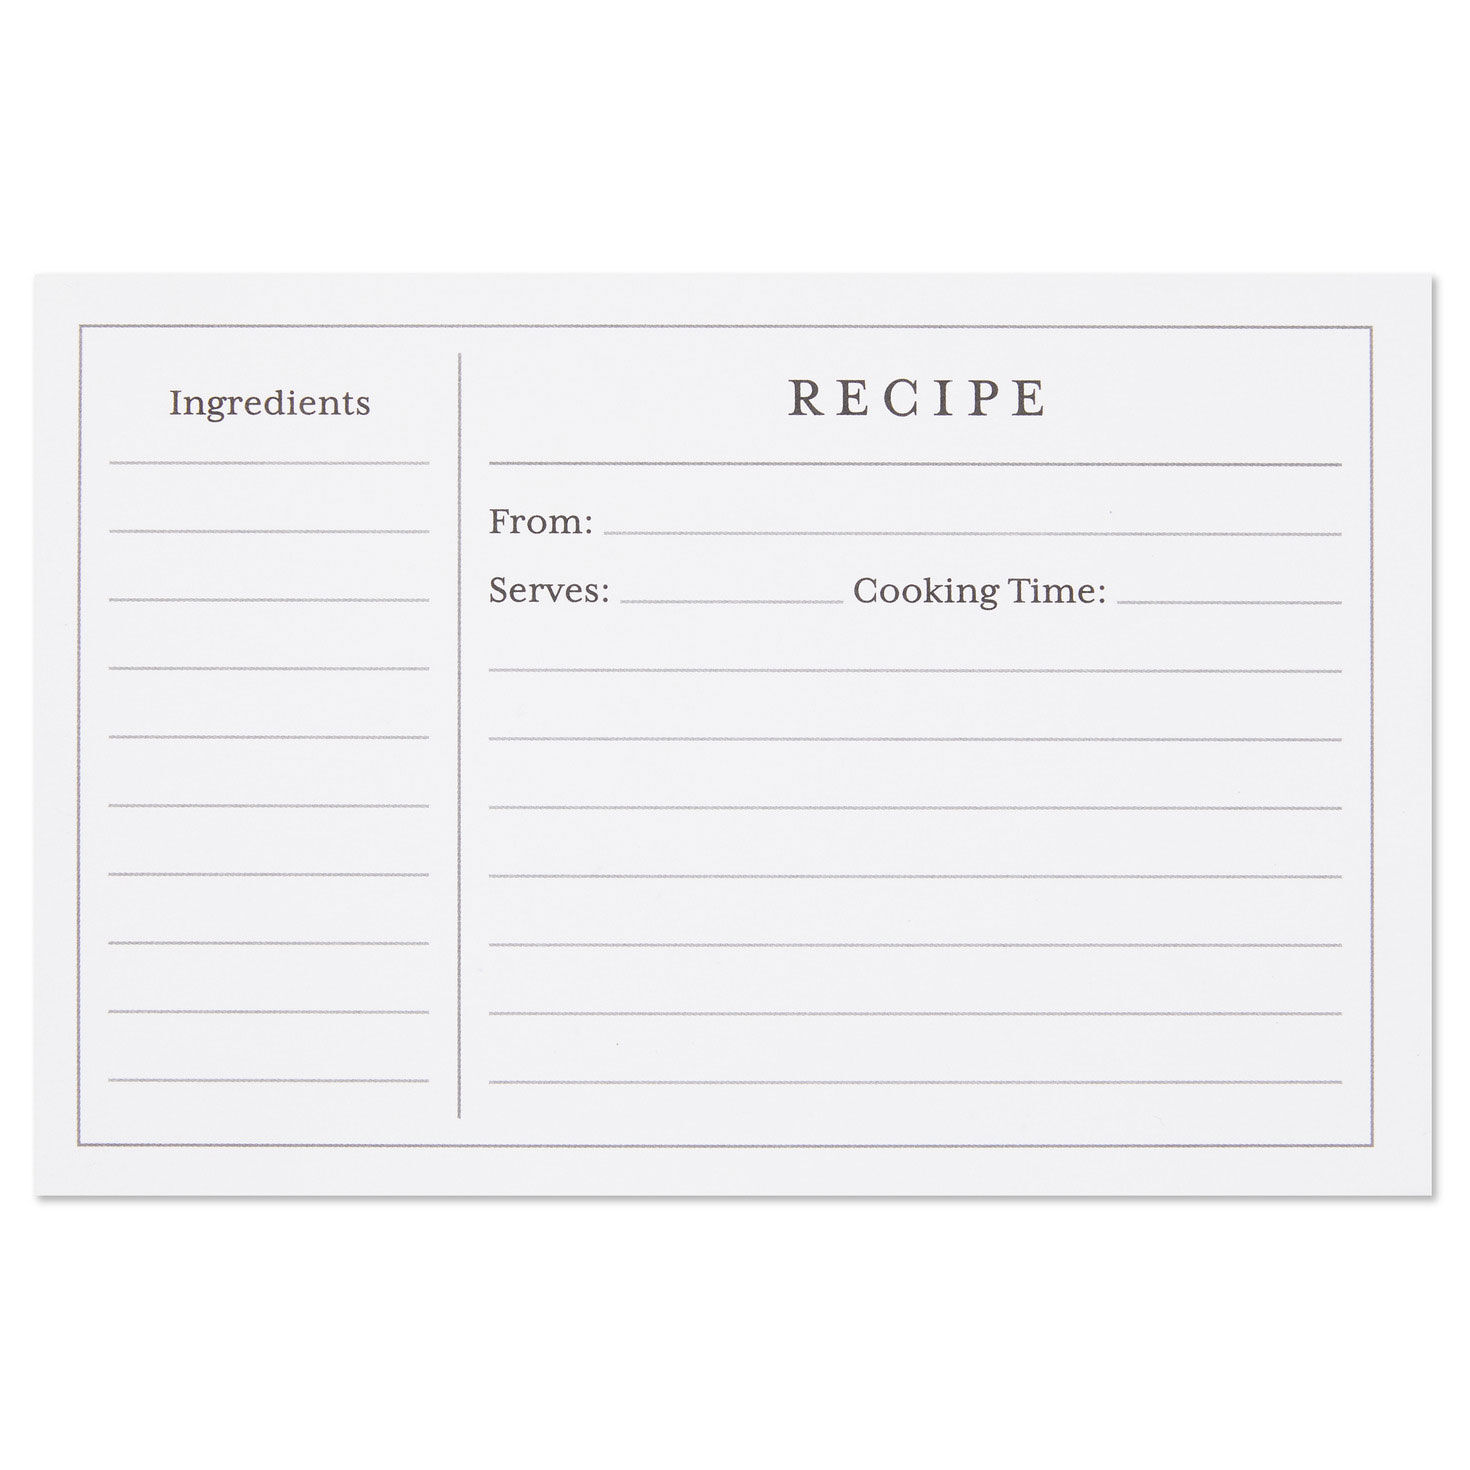
The most common recipe card dimensions are 3 x 5 inches and 4 x 6 inches. A 4 x 6-inch card gives you more room for ingredients and steps, while a 3 x 5-inch card works well for short recipes and compact storage. A 5 x 7-inch card is another useful choice for longer recipes or larger handwriting.
In American kitchens, recipe cards often hold family favorites, handwritten notes, and quick meal ideas. Many people keep them in a small box near the stove or tuck them into a kitchen drawer. The right size makes each card easy to read, use, and store without taking up too much space.
Choosing recipe card dimensions is not just about the paper. You also need to think about how much text the recipe needs, which printer you use, and where the cards will live. A short cookie recipe may fit on a small card, but a detailed bread recipe with rising times and several steps may need more room.
This guide explains common US recipe card sizes, how to choose the right measurements, and how to print cards at home. It also covers margins, card stock, storage, and common printing errors so you can make cards that suit your recipes and your kitchen.
The most familiar recipe card dimensions are 3 x 5 inches and 4 x 6 inches. Both sizes are compact enough for kitchen storage, but they offer different amounts of writing space. Larger cards, such as 5 x 7 inches, can be useful for detailed recipes or people who prefer large text.
There is no single size that every recipe card must follow. Personal recipe cards, printable templates, store-bought cards, and family cookbook projects may use different measurements. The best choice depends on the recipe, the layout, and the storage system.
The table below compares common card sizes used for recipes. These are practical format options, not a rule that every recipe card must meet.
Source: etsy.com
3 x 5 inches
A compact format for short recipes, basic ingredient lists, and small recipe boxes.
4 x 6 inches
A versatile size for everyday cooking, with extra space for ingredients, directions, and brief notes.
5 x 7 inches
A larger format for longer directions, bigger handwriting, and added recipe notes.
3 x 5-Inch Recipe Cards
A 3 x 5-inch card measures 3 inches across and 5 inches tall when held in portrait orientation. In landscape orientation, the same card measures 5 inches across and 3 inches tall. The dimensions describe the same rectangle, just turned in a different direction.
This size works best when the recipe is brief. A simple salad dressing, a basic spice mix, or a short list of sandwich ingredients may fit well. Long cooking instructions can become cramped, especially when you need to include oven temperatures, preparation times, and serving amounts.
Best use
Short recipes, quick reference notes, and compact recipe collections.
Main limitation
Limited space for long directions, large handwriting, or recipe changes.
4 x 6-Inch Recipe Cards
A 4 x 6-inch recipe card measures 4 inches by 6 inches. It offers more room than a 3 x 5-inch card while remaining small enough for many recipe boxes and organizers. This makes it a useful starting point for a new collection.
The extra space helps when a recipe has several ingredients or more than a few steps. You can also leave a small area for the source, a family note, or a change you made to the original recipe. Still, a very long recipe may need a second card or a larger format.
Best use
Everyday meals, baking recipes, family favorites, and recipes with moderate directions.
Main advantage
A useful balance between writing space and easy storage.
5 x 7-Inch Recipe Cards
A 5 x 7-inch card gives you a larger area for text, headings, and notes. It can be a better fit for recipes with several stages, such as bread, layered desserts, or dishes with separate sauce and filling instructions.
The larger format also suits people who prefer to write by hand in larger letters. Before choosing it, check your storage box or binder. A card that is easy to read can still be inconvenient if it does not fit your existing organizer.
Best use
Long recipes, detailed baking instructions, large handwriting, and decorative recipe collections.
Main trade-off
More storage space is needed, and fewer cards may fit in a compact box.
Recipe Card Size Comparison in Inches and Centimeters
If you are making a printable template, converting inches to centimeters helps you check the size in design software that uses metric units. One inch equals 2.54 centimeters. Use that conversion to calculate the intended width and height before you set up the page.
The following table lists the physical dimensions of common recipe card formats. Centimeter values are rounded to two decimal places where needed.
Source: getmorsel.com
3 x 5 inches
7.62 x 12.70 centimeters, a compact format for short recipes.
4 x 6 inches
10.16 x 15.24 centimeters, a practical size for many home recipe collections.
5 x 7 inches
12.70 x 17.78 centimeters, a larger format for detailed recipes.
How Much Larger Is a 4 x 6-Inch Card?
A 3 x 5-inch card has an area of 15 square inches. A 4 x 6-inch card has an area of 24 square inches. That means the 4 x 6-inch format provides 9 more square inches of surface area, or 60 percent more than the smaller card.
A 5 x 7-inch card has an area of 35 square inches. Compared with a 4 x 6-inch card, it provides 11 additional square inches. This difference can make room for larger text or more white space, though the extra area does not guarantee that every recipe will fit on one card.
Small card
Choose 3 x 5 inches when storage space matters more than extra writing room.
Middle size
Choose 4 x 6 inches when you need a balance of readability and compact storage.
Large card
Choose 5 x 7 inches when the recipe needs more space or the text must be larger.
Portrait and Landscape Orientation
Portrait orientation means the card is taller than it is wide. Landscape orientation means it is wider than it is tall. A 4 x 6-inch card can be used in either direction, provided the template and the printed card match.
Portrait layouts often suit ingredient lists followed by numbered directions. Landscape layouts can work well for two-column designs, with ingredients on one side and cooking steps on the other. Test the layout with a real recipe before printing a full set.
Portrait
Useful for a single vertical flow of ingredients, steps, and notes.
Landscape
Useful for side-by-side sections or wide recipe titles.
Which Recipe Card Dimensions Should You Choose?
Choose a recipe card size based on the amount of information you need to display and how you plan to store it. The smallest card is not always the most practical option. A larger card can save time when cooking because you do not have to squeeze directions into tiny spaces or search for a second card.
Start by reviewing three or four recipes from your collection. Look at the longest ingredient list, the number of steps, and any details that are easy to forget. Use the recipe that needs the most space as your guide rather than designing around the shortest recipe.
Source: etsy.com
For short recipes
A 3 x 5-inch card may work when the ingredients and directions are brief.
For everyday cooking
A 4 x 6-inch card gives many home cooks room for a title, ingredients, directions, and a few notes.
For detailed recipes
A 5 x 7-inch card may offer more room for several stages, baking times, and adjustments.
For gift sets
Pick a consistent size that fits the intended box or packaging and leaves room for readable text.
Match the Card to the Recipe Length
A short recipe can fit on a small card without much effort. A complex recipe may need a larger card or a second card to keep the text readable. Avoid solving every space problem by shrinking the font because tiny instructions are harder to read while cooking.
For example, a simple vinaigrette might need only a few ingredients and two or three short steps. A loaf of bread may need ingredient amounts, kneading directions, two rising periods, shaping steps, and baking details. The bread recipe is a stronger test of whether your chosen size offers enough room.
Count the steps
More steps usually mean you need more room for clear directions.
Include key details
Keep oven temperatures, cooking times, and ingredient amounts visible.
Consider Your Handwriting and Reading Needs
Handwritten cards need enough room for letters to stay clear. If you write in large print, use a 4 x 6-inch or 5 x 7-inch format before trying to fit everything on a 3 x 5-inch card. Leave space between sections so you can scan the recipe while preparing food.
Printed cards also need a readable type size. The best size depends on the font, line spacing, and amount of text, so there is no single font size that works for every design. Print a sample and read it at the distance you would normally use in your kitchen.
Use clear type
Choose a simple font and avoid decorative lettering for the main directions.
Leave breathing room
Use spacing between ingredients and steps instead of filling every empty area.
Check Your Recipe Box or Binder First
The inside dimensions of your storage system matter more than its outside measurements. A box may have thick walls, dividers, or a lid that reduces the usable space. A binder may also need room for protective sleeves or page edges.
Measure the usable width, height, and depth before you buy cards or print a large batch. If you already own recipe cards, measure one card and compare it with the box. This simple check can prevent a stack of finished cards from becoming too large for the space you planned to use.
Measure the interior
Use the clear space inside the box, not the overall outside dimensions.
Allow for accessories
Include dividers, sleeves, tabs, or binding hardware in your storage plan.
How to Print Recipe Cards at the Correct Size
To print recipe cards at the correct size, set the document to the intended card dimensions, check the printer’s paper settings, and confirm the print scale. A template that looks right on a computer screen may print too large or too small if the software changes the page scale.
You can print one card on a sheet or arrange several cards on a larger sheet of paper. The second method can save paper, but each card must have enough space around it for cutting. Your printer’s supported paper sizes and printable area will affect the final layout.
Source: Etsy
Before you begin
Prepare your template, a ruler, suitable card stock, a printer, and a way to cut the cards if you are printing multiple cards per sheet.
Check the measurements
Confirm that the template width and height match the intended finished card size.
Step 1: Set Up the Document
Open your preferred document or design software and set the page or card area to the chosen dimensions. For a 4 x 6-inch card, the design should measure 4 inches wide and 6 inches tall in portrait orientation, or 6 inches wide and 4 inches tall in landscape orientation.
If your software uses centimeters, enter 10.16 x 15.24 centimeters for a portrait 4 x 6-inch card. Check that the software has not automatically added extra margins or changed the page orientation.
Set width and height
Enter the exact intended card measurements before adding text and graphics.
Keep the layout simple
Use clear headings and enough space for ingredients and directions.
Step 2: Set the Printer Options
Open the print dialog and check the paper size, orientation, and scaling options. If the card design is already set to its final physical dimensions, select 100 percent scale or Actual Size when available. Avoid Fit to Page when exact measurements matter because that setting may resize the design.
The paper size in the printer dialog should match the sheet loaded in the printer. A card-sized design can be placed on a larger sheet, but the software and printer must preserve the design’s intended dimensions. Follow the printer manufacturer’s instructions for card stock and specialty media.
Confirm paper size
Choose the size of the sheet in the printer, not merely the size of the design.
Review scaling
Use actual-size printing when the design already has the correct dimensions.
Step 3: Print and Measure a Test Card
Print one sample before producing a full set. Let the ink dry as needed, then measure the card with a ruler. If a design intended to be 4 inches wide measures only 3.8 inches, check whether the print dialog scaled the page or whether the card was cut inside the intended boundaries.
The finished card should match the planned dimensions closely enough for your storage system. A small difference can matter when cards need to fit into a snug box or protective sleeve. Correct the settings and test again before printing more copies.
Measure both sides
Check the width and height of the finished card rather than judging it by appearance.
Check the cut lines
Make sure you cut along the template’s intended edges, not inside the design.
Step 4: Arrange Multiple Cards on One Sheet
Printing several cards on one sheet can reduce paper waste. A standard US Letter sheet measures 8.5 x 11 inches, but the printable area may be smaller because many printers cannot print to the very edge. The space available for cards therefore depends on printer margins and the gaps needed for cutting.
For example, two 4 x 6-inch cards placed side by side need at least 8 inches of width before you add cutting gaps or outside margins. That leaves only half an inch of total width on an 8.5-inch sheet for both outer margins and any gap. This layout may be tight on some printers, so check the printable area before using it.
A portrait US Letter sheet can also fit smaller cards in a grid, depending on the layout and margins. Do not assume that a theoretical grid will print correctly on every device. Use a template that accounts for your printer’s limits and test the cut card measurements.
Leave cutting space
Allow room between cards for clean cuts and avoid placing important text near the edges.
Check printer limits
Some printers leave wider unprinted borders than others.
What Paper Should You Use for Recipe Cards?
Card stock is a practical choice for recipe cards because it feels firmer than ordinary printer paper. The exact paper weight depends on the printer, the intended use, and how the cards will be stored. A heavier sheet may feel more durable, but it is not automatically supported by every home printer.
Check your printer manual before loading thick card stock. The allowed paper weight, feed path, and supported media types vary by model. Use the rear feed or specialty media setting only if your printer’s instructions recommend it.
Source: shutterstock.com
Light card stock
Can suit cards that will be stored in a box or binder and handled with care.
Heavier card stock
Can feel firmer, but it may not feed correctly in printers that support only lighter paper.
Pre-cut cards
Can reduce trimming work when the card dimensions match your template and printer requirements.
Matte, Glossy, or Textured Paper
Matte card stock is often a practical choice for handwritten recipes because many pens and pencils work well on its surface. Glossy paper can produce bright images, but some inks may take longer to dry or may smear if the coating is not suited to the ink. Textured paper can look attractive, though very rough surfaces may make small handwriting harder to read.
If you plan to write on the cards after printing, test the exact paper and pen together. A quick test helps you check drying time, smudging, and readability before you prepare the whole collection.
For handwriting
Try matte paper and check that your chosen pen dries without smearing.
For color designs
Use paper approved for your printer and test how images and text appear.
Inkjet and Laser Printer Compatibility
Inkjet and laser printers use different printing processes, so paper suitable for one type may not suit the other. Some coated papers are made for inkjet printing, while laser printers require media that can tolerate the heat used during printing. Using unsuitable paper can lead to poor output or feeding problems.
Read the paper packaging and printer manual before printing. Do not feed paper through a printer if the manufacturer warns against that media type or weight.
Inkjet printers
Choose paper made for inkjet use when the surface has a special coating.
Laser printers
Choose media labeled for laser use and follow the printer’s weight limits.
How to Design a Recipe Card That Is Easy to Read
A useful recipe card makes the key details easy to find at a glance. The reader should be able to locate the recipe name, ingredient amounts, and cooking steps without searching through decorative elements. Good spacing often matters more than elaborate artwork.
Keep the layout consistent across a collection. When every card uses the same order for ingredients, directions, timing, and notes, it becomes easier to follow a recipe while cooking. You can add color or small illustrations as long as they do not compete with the instructions.
Source: etsy.com
Recipe name
Place the title near the top and make it easy to spot.
Ingredients
List amounts and ingredient names clearly, using one item per line when space allows.
Directions
Use short numbered steps in the order the cook should follow.
Timing and yield
Include preparation time, cooking time, resting time, or servings when they matter to the recipe.
Notes
Reserve space for substitutions, family tips, or changes that have worked for you.
Leave Safe Margins Around the Text
Keep important text away from the card edges. A margin of about 0.2 to 0.25 inches can be a useful starting point for many layouts, but the right margin depends on the printer, cutting method, and design. It is not a universal printer specification.
If you plan to trim the cards by hand, keep text away from cutting lines so small cutting errors do not remove letters. Print a test card and check the edges before using a large batch.
Keep text inside the margin
Place ingredient amounts and instructions well inside the finished card boundary.
Use extra room for cuts
Allow gaps between cards on a sheet when using scissors or a paper trimmer.
Use Color Without Hiding the Text
Light backgrounds with dark text are usually easy to read. Strong patterns, busy photos, and pale text can make directions harder to scan, especially in a kitchen with changing light. Keep decoration around the title or edges rather than behind long ingredient lists.
If you want to add a photo, use one small image or a simple border. Check that the card still works in grayscale if you may print it on a black-and-white printer.
Prioritize contrast
Use text and background colors that remain distinct.
Most recipe card printing problems come from incorrect scaling, mismatched paper settings, tight margins, or a layout that contains too much text. Check the finished measurements before changing the design itself. A small test print can show whether the problem comes from the file, the printer, or the cutting process.
Use the checks below in order. Start with the easiest settings to verify, then adjust the layout or paper if the problem remains.
Source: storage.googleapis.com
The card prints too small
Check whether Fit to Page or another scaling option reduced the design. Use actual-size printing when appropriate, then measure a new test.
The card prints too large
Confirm the template dimensions and printer scaling. Check whether the software expanded the design to fill the sheet.
Text is cut off
Move text farther from the edges, check printer margins, and confirm that the finished card is being cut along the correct lines.
The paper jams or curls
Check the printer’s supported media weight and paper path. Try approved paper before changing other settings.
Ink smears
Check that the paper suits the printer and allow the ink to dry as directed by the paper or printer instructions.
Why Does My Printable Recipe Card Change Size?
A printable card can change size when a document editor, PDF viewer, or printer driver scales the page. The settings may use labels such as Fit, Shrink Oversized Pages, Scale to Fit, or Actual Size. The exact wording depends on the software.
Check the dimensions in the original file first. Then open the print dialog and confirm the scale, paper size, and orientation. Print another test and measure it with a ruler before making more copies.
First check
Confirm the width and height in the original template.
Second check
Review the scaling and paper settings in the print dialog.
Final check
Measure the physical card after printing and cutting.
Why Is My Recipe Card Too Crowded?
A crowded card may have too many ingredients, long directions, large decorative elements, or spacing that uses more room than needed. First remove repeated wording and place related information together. Keep important cooking details rather than cutting them just to make the recipe fit.
If the card still feels cramped, move to the next size up or split the recipe across two clearly labeled cards. A readable recipe is more useful than a small card that forces the cook to guess at a missing step.
Simplify the layout
Reduce unnecessary decoration and use clear section headings.
Increase the card size
Choose a larger format if the recipe needs more space for complete directions.
How to Store Recipe Cards and Keep Them Organized
A recipe card system works best when every card has a clear place. You can use a recipe box, a drawer organizer, a binder with suitable sleeves, or a small file system. The right option depends on how often you cook, how many recipes you keep, and whether you want to add cards over time.
Check the usable storage dimensions before committing to a card size. The cards should slide in and out without bending, and dividers should leave enough room for the full stack. If you are making a gift set, test the finished cards inside the intended box before assembling the whole set.
Source: storage.googleapis.com
Use category dividers
Separate recipes into groups such as breakfast, main dishes, sides, desserts, and sauces.
Keep one orientation
Store cards in a consistent direction so titles are easy to scan.
Leave room to grow
Allow spare space for new recipes instead of filling every section from the start.
Recipe Boxes
A recipe box suits people who want a small collection of loose cards that can be pulled out while cooking. Measure the interior and check any divider tabs before choosing between 3 x 5-inch, 4 x 6-inch, or larger cards.
Do not assume that every box sold as a recipe box fits every standard card size. Products can vary in their interior dimensions and layout. Use the actual measurements supplied by the maker or measure the box yourself.
Best for
Small to medium collections of loose cards that are easy to rearrange.
Check before buying
Confirm the inside width, height, and depth, including any dividers.
Binders and Protective Sleeves
A binder can suit larger collections or people who want to keep related recipes together. If you use protective sleeves, check the sleeve’s internal pocket size rather than relying on the outer package size. The card must fit inside the pocket without folding at the corners.
Sleeves can help keep paper away from spills and frequent handling, but they do not make every card waterproof. Remove a card from the kitchen work area when liquids are likely to reach it, and follow the sleeve manufacturer’s care instructions.
Best for
Larger collections, recipes arranged by section, and cards that need extra protection from handling.
Check before buying
Measure the usable pocket and allow room for the sleeve’s seams or binding holes.
Frequently Asked Questions
Q
What Is the Most Common Recipe Card Size?
The 3 x 5-inch and 4 x 6-inch formats are common choices for recipe cards. A 3 x 5-inch card suits short recipes and compact storage, while a 4 x 6-inch card provides more room for ingredients and directions. Check your existing box or binder before choosing one.
Q
Is a 4 x 6-Inch Recipe Card the Same as an Index Card?
A 4 x 6-inch recipe card has the same nominal dimensions as a 4 x 6-inch index card. However, the paper weight, surface, ruling, and printed layout may differ. If you plan to use an index card for a recipe, make sure it has enough room for the full instructions.
Q
Can I Print Recipe Cards on Regular US Letter Paper?
Yes. US Letter paper measures 8.5 x 11 inches and can hold recipe card designs arranged for printing and cutting. The number of cards that fit depends on their size, the printer’s non-printable margins, and the gaps needed for trimming. Check the layout and print a test before making a full batch.
Q
What Size Should a Recipe Card Be for a Gift?
A 4 x 6-inch card is a useful starting point for a recipe gift set because it offers room for a title, ingredients, and directions. A 5 x 7-inch card may suit longer recipes or larger handwriting. Choose the size after checking the gift box and the amount of information on each card.
Q
How Much Space Should I Leave Around a Recipe Card?
A margin of about 0.2 to 0.25 inches can be a useful design starting point, but the correct amount depends on your printer and cutting method. Keep important text away from the edges, and allow extra space between cards on a larger sheet if you need to cut them apart.
Q
Can I Make Recipe Cards in Microsoft Word?
Yes. You can create a recipe card in Microsoft Word by setting up a page or table with the intended dimensions, adding text boxes or cells, and checking the print scale. The exact steps depend on your Word version and layout method. Print one sample and measure the finished card before printing more.
✦ Wrapping Up
Conclusion
The best recipe card dimensions depend on how much space your recipes need and where you plan to store them. A 3 x 5-inch card suits short recipes, a 4 x 6-inch card gives you more room for everyday cooking, and a 5 x 7-inch card works well when clear, spacious text matters most.
Before printing, check the storage space, set the correct document dimensions, and review the printer’s paper and scaling settings. Use suitable card stock, leave enough room around the text, and test one finished card with a ruler. These small checks can save paper and help your recipe collection stay neat and easy to use.
💡 Key Takeaway
Start with a 4 x 6-inch template, compare it with your longest recipe, and check that the finished card fits your box or binder. Print one test at actual size before making the full set.