Lekue bread maker recipes let you mix, knead, proof, and bake homemade bread in a flexible silicone container. Start with a simple white loaf, then try whole wheat, rye, multiseed, or sourdough bread. The key to good results is to measure the ingredients well, give the dough enough time to rise, and bake it in a fully heated oven.
Fresh bread is a welcome treat in many American homes. A warm loaf works for breakfast toast, a grilled cheese sandwich, or a bowl of soup on a cool evening. You do not need a large stand mixer or a bread machine to make it. The Lékué Bread Maker is a flexible silicone baking container designed to help with several steps in the bread-making process.
Unlike an electric bread machine, this product does not mix and bake bread on its own. You mix and knead the dough, let it rise, and place the container in a conventional oven for baking. Its partly closed shape helps hold moisture around the dough, while the openings allow hot air to circulate. The result depends on your flour, water, yeast, rising time, and oven, just as it does with other bread methods.
This guide covers practical recipes for common types of homemade bread. It also explains how to adjust whole wheat flour, add seeds, work with sourdough starter, and fix common baking problems. The recipes are starting points for a standard-size Lékué Bread Maker, not a claim that every dough will behave the same way. Check the capacity and instructions for your exact model before baking.
The Lékué Bread Maker is a flexible, heat-resistant silicone container made for home bread baking. It lets you weigh or mix ingredients in one place, shape the dough, let it rise, and bake the loaf without moving it through several bowls and pans. This can cut down on washing up and make sticky dough easier to handle.
The standard model is listed by the manufacturer with a capacity of about 600 milliliters and a maximum temperature of 220 degrees Celsius, or about 428 degrees Fahrenheit. The exact dimensions and limits can vary by model, so check the label or manual for your own container. Do not assume that every silicone product can withstand the same oven heat.
The flexible bowl is useful for dough that would otherwise stick to a proofing basket or require a special baking pan. It is not a replacement for an oven, and it does not have a motor or a heating element. You still control the kneading, fermentation, oven temperature, and baking time.
Mix, shape, proof, and bake in the same piece of bakeware when the recipe and dough allow it.
Moist baking space
The partly closed shape helps retain moisture around the loaf while the side openings allow hot air to move.
Flexible storage
The silicone body can be easier to store than a rigid bread pan, provided it is clean and dry.
What You Need Before You Start
A kitchen scale is the most useful tool for repeatable bread. Flour can settle in a measuring cup, so a cup filled loosely may weigh less than one packed down. Weighing the flour and water helps you keep the dough close to the recipe each time.
Basic tools
Prepare a kitchen scale, mixing spoon or dough scraper, clean work surface, oven mitts, and wire cooling rack.
Fresh ingredients
Check the date on your yeast and use flour suited to the loaf you plan to make.
A suitable oven
Use a conventional oven and follow the silicone container’s temperature limit. Do not place it over a burner or open flame.
1. Easy Lékué White Bread Recipe
White bread is a good place to begin because it uses familiar ingredients and lets you learn how dough should feel before trying heavier grains. This small loaf is based on a simple flour, water, salt, and yeast formula. It is a practical starting recipe for a standard-size container, but check the capacity of your model before mixing.
The dough should feel soft and elastic after kneading. It may cling slightly to your fingers, but it should not pour like batter. If it feels dry and tears when you stretch it, add water a teaspoon at a time. If it is very wet and will not hold any shape, let it rest briefly before adding a little flour.
Source: thebreadshebakes.com
Ingredients
Use 250 grams bread flour, 155 grams lukewarm water, 5 grams salt, and about 3 grams instant yeast. If using active dry yeast, follow its package directions for mixing and activation.
Expected yield
This formula makes one small loaf. The final size depends on flour absorption, fermentation, shaping, and baking.
Oven setting
Preheat the oven to 400 degrees Fahrenheit. Use the setting and rack position recommended by your model’s instructions.
How to Make the White Bread
1. Put the flour, yeast, and water in the container. Keep the salt from sitting directly against a small pile of yeast before mixing. Stir until the ingredients form a rough dough, then add the salt if it has not already been mixed in.
2. Knead the dough until it looks smooth and feels elastic. This may take about 8 to 10 minutes by hand, although flour type and kneading method can change the time. If the flexible bowl makes kneading awkward, move the dough to a clean work surface and return it to the container afterward.
3. Cover the dough so its surface does not dry out. Let it rise at room temperature until it has roughly doubled in size. A warm kitchen may speed up the rise, while a cool kitchen may slow it down. Use the dough’s size and feel as your guide.
4. Gently press out large gas pockets, shape the dough into an oval loaf, and place it back in the container. Let it rise again until it looks puffy. Preheat the oven while the loaf finishes its final rise.
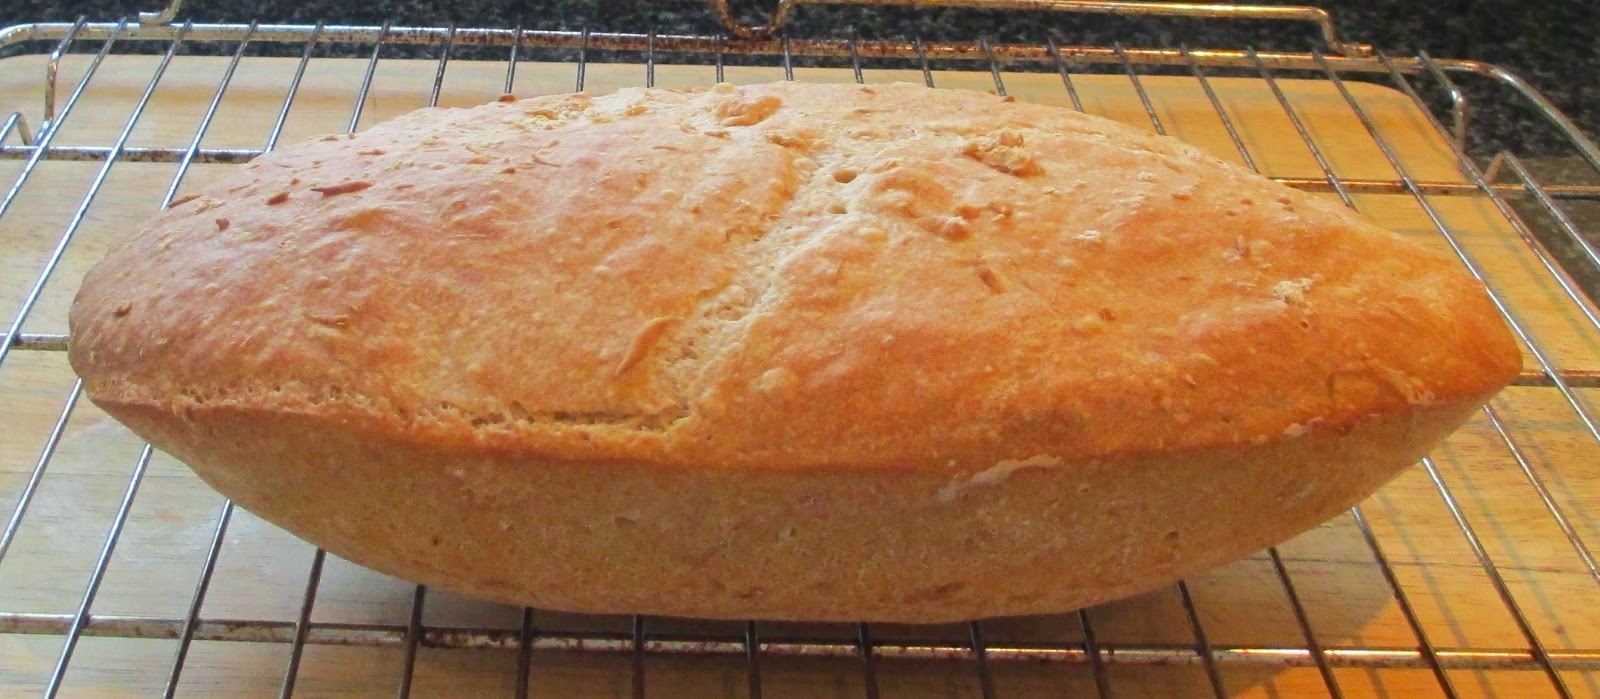
5. Bake for about 25 to 35 minutes, checking the loaf near the early end of that range. The exact time depends on loaf size, oven behavior, and dough moisture. If the crust is browning too quickly, check the oven temperature and use the recipe’s appropriate adjustment rather than leaving the bread to burn.
6. Remove the container with oven mitts. Open or fold it carefully because hot steam can escape. Take the loaf out when safe to handle and cool it on a wire rack before slicing.
Sign of success
The loaf should have a golden crust and a set center. A fully baked loaf should not have a wet, gummy line through the middle.
If the loaf is dense
Check that the yeast is active, the dough had enough time to rise, and the flour was measured correctly. A dense loaf can also result from too much flour or inadequate kneading.
2. Whole Wheat Bread for Everyday Meals
Whole wheat bread has a deeper, nutty flavor than white bread and works well for toast, sandwiches, and simple snacks. Whole wheat flour contains bran and germ as well as the starchy part of the grain. These parts absorb water and can make dough feel firmer than a white flour dough made with the same amount of liquid.
A mix of whole wheat and bread flour gives you a useful balance of flavor and structure. Using only whole wheat flour is possible, but the loaf may be denser and may need more water and careful fermentation. Start with a blend until you know how your flour behaves.
Add 1 teaspoon honey or maple syrup if you like a mild sweet note. This is optional and will slightly change the dough’s flavor and browning.
Whole Wheat Bread Method
Mix both flours with the yeast and water until no dry patches remain. Add the salt and knead until the dough is even and elastic. Whole wheat dough may feel rough at first, so allow a short rest before deciding whether it needs more water.
Cover the dough and let it rise until noticeably larger. Shape it into an oval, return it to the container, and allow a second rise until puffy. Avoid waiting for an exact doubling if the dough is already soft and full of air; overproofed dough can lose strength.
Bake in a preheated oven at about 400 degrees Fahrenheit for roughly 30 to 40 minutes, checking for a firm crust and a baked center. Cool fully on a wire rack. If the loaf seems heavy, reduce excess flour in the next batch and allow enough time for both rises.
For a softer crumb
Keep the dough moist enough to stretch without tearing and avoid packing extra flour into the measuring cup.
For a stronger whole grain taste
Increase the whole wheat share gradually and adjust the water based on the dough’s feel.
3. Rustic Rye Bread in the Lékué Container
Rye bread has a hearty taste and pairs well with cheese, eggs, soups, and savory spreads. Rye flour behaves differently from wheat flour because its dough does not form the same strong gluten structure. A rye loaf may feel stickier and less stretchy, so do not judge it by the same smooth, elastic texture expected from white bread.
For a first rye loaf, blend rye flour with bread flour. This gives the loaf more structure and makes it easier to shape. A high-rye or all-rye loaf needs a formula designed for that purpose, particularly when sourdough is involved.
Source: blogspot.com
Ingredients
Use 150 grams bread flour, 100 grams rye flour, 170 grams water, 5 grams salt, and 3 grams instant yeast.
Optional seeds
Add 1 tablespoon caraway seeds for a traditional savory note, or leave them out for a milder loaf.
How to Bake the Rye Loaf
Mix the two flours with the yeast and water. Add the salt and stir until a sticky dough forms. Knead gently until the ingredients are evenly combined. Rye dough can remain tackier than wheat dough, so resist adding large amounts of flour just to make it feel dry.
Cover the dough and let it rise until it has expanded and looks airy. Shape it with damp hands or a lightly floured surface, then return it to the container for a second rise. Rye dough may not double as dramatically as a white loaf, so look for visible growth rather than a strict volume target.
Bake in a preheated oven at about 400 degrees Fahrenheit for around 30 to 40 minutes, adjusting to the size and shape of the loaf. Let it cool fully before cutting. Rye bread often slices more cleanly after it has had time to set, and a warm cut can make the inside seem gummy even when the loaf is baked.
Common mistake
Adding too much flour to a sticky rye dough can make the finished loaf dry and heavy.
Serving idea
Try thin slices with sharp cheddar, sliced cucumber, or a simple egg salad.
4. Multiseed Bread With a Crisp Crust
Multiseed bread adds crunch and a richer flavor to an everyday loaf. Sunflower seeds, sesame seeds, pumpkin seeds, and flaxseed can all work well, but large additions can make dough harder to shape. Keep the first batch simple and use a modest amount of seeds so the dough can still hold its shape.
Seeds absorb some moisture, especially if you use a large amount or add whole flaxseed. A slightly tacky dough is often easier to work with than one that has been made too dry. Toasting seeds can deepen their flavor, but let them cool before adding them to the dough.
Combine sunflower seeds, pumpkin seeds, sesame seeds, and a small amount of flaxseed to suit your taste.
Steps for Multiseed Bread
Mix the flours, yeast, and water until the dough comes together. Add the salt and knead until the dough begins to feel smooth. Work the seeds in near the end of kneading so they spread through the dough without making the early mixing difficult.
Cover and let the dough rise until it has grown and looks airy. Shape it into a compact oval and place it back in the container. Allow a second rise until the loaf looks puffy, but do not leave it so long that it collapses when touched.
Bake at about 400 degrees Fahrenheit for approximately 30 to 40 minutes. Watch the crust as the loaf nears the end of baking because seeds on the surface can brown quickly. Let the loaf cool before cutting so the inside can finish setting.
For more crunch
Sprinkle a few seeds on the surface before baking, pressing them gently into the dough so they stay in place.
For a softer loaf
Keep the seed amount moderate and make sure the dough has enough water to stay pliable.
5. Sourdough Bread for a Slower Bake
Sourdough bread uses a live starter made from flour and water instead of relying only on commercial yeast. The starter contains wild yeast and bacteria that ferment the dough and create its distinct flavor. This method can work with a Lékué Bread Maker, but it needs more attention to timing because starter strength and room temperature affect how quickly dough rises.
A sourdough recipe should be based on an active starter that shows signs of fermentation. A starter that has been stored in the refrigerator may need feeding before use. There is no single rise time that suits every starter, so look for bubbles, expansion, and a dough that feels lighter and more aerated.
Source: thebreadshebakes.com
Ingredients
Use 350 grams bread flour, 100 grams active sourdough starter, 220 to 240 grams water, and 7 grams salt. Start near the lower water amount if your flour or starter is very wet, then adjust by feel.
Important note
This is a starting formula for a wheat sourdough loaf, not a guaranteed timetable. Starter hydration, flour type, and room temperature can change the dough.
Sourdough Method
Mix the starter with most of the water, then add the flour and combine until no dry flour remains. Let the dough rest for about 20 to 30 minutes if convenient. Add the salt and remaining water as needed, then knead or fold until the dough has more strength.
Cover the dough and allow it to ferment at room temperature. During this stage, a few gentle folds can help build structure. Continue until the dough has expanded and feels airy. Depending on the starter and room temperature, this can take several hours, and the clock should not be the only guide.
Shape the dough into an oval and place it in the Lékué container for its final proof. When the loaf looks puffy and responds slowly to a gentle touch, preheat the oven. Bake at a temperature suited to your model, starting around 425 degrees Fahrenheit only if that setting is within the manufacturer’s stated limit. The standard model’s listed maximum is about 428 degrees Fahrenheit, so do not exceed it.
Bake until the crust is well colored and the center is cooked through. If the crust darkens before the inside is ready, review the oven temperature and loaf size on the next bake. Cool completely before slicing, since sourdough crumb can remain moist and fragile while hot.
If the dough spreads
It may be too wet, underdeveloped, or overproofed. Use slightly less water next time, build strength with folds, or shorten the final proof as appropriate.
If the loaf tastes too sour
Fermentation time and starter condition influence flavor. Try a shorter fermentation or a starter used closer to its active stage, while still allowing the dough to rise enough.
6. How to Adjust Bread Recipes for Your Container
The most useful way to adapt a bread recipe is to keep the flour, water, salt, and yeast in balance. Do not simply double every ingredient because the container looks roomy. Dough expands during fermentation, and a loaf that fills the container before baking may rise over the edge or bake unevenly.
The standard Lékué Bread Maker is listed at about 600 milliliters in capacity, but capacity does not directly tell you how many grams of flour a recipe can hold. Dough volume changes as gas forms. Use a recipe intended for a similar loaf size and leave room for expansion during proofing.
Source: banana-breads.com
Use a scale
Weigh flour and water in grams. This is more repeatable than relying on cups, especially when switching between bread flour, whole wheat flour, and rye flour.
Change one factor at a time
When a loaf comes out too dense or too dry, adjust the water, proofing time, or oven setting separately on the next attempt. Changing several things at once makes the cause harder to identify.
Check the exact model
The standard and mini versions have different capacities. Use a smaller formula for a mini model rather than filling it with a standard-size dough.
A Simple Dough Hydration Example
Hydration means the amount of water compared with the amount of flour, shown as a percentage. For example, a dough with 250 grams of flour and 160 grams of water has 64 percent hydration because 160 divided by 250 equals 0.64. This calculation is useful when you want to compare dough formulas or adjust a recipe in a controlled way.
A higher hydration dough is often softer and stickier, while a lower hydration dough is firmer. Flour type changes how that water feels, so a 64 percent white flour dough may feel different from a 64 percent whole wheat dough. Treat the number as a guide, not a promise of a particular texture.
White flour
Begin with a moderate amount of water and add small amounts only if the dough feels stiff.
Whole wheat flour
Allow time for the bran to absorb water before deciding whether the dough needs more.
Rye flour
Expect a stickier dough and avoid adding excess flour simply to make it feel like white bread dough.
7. Common Bread Baking Problems and Fixes
Most bread problems come from a few basic causes: dough that is too dry or too wet, yeast that is weak, a rise that is too short or too long, or an oven that is not at the expected temperature. Check these factors in a consistent order rather than changing the whole recipe after one poor loaf.
Keep a short baking note with the flour brand, ingredient weights, room temperature if known, rise time, and oven setting. This makes it easier to spot patterns. One loaf is not enough to prove a recipe is faulty, especially when flour and kitchen temperatures change.
Source: banana-breads.com
Dense bread
Possible causes include too much flour, inactive yeast, insufficient kneading, or too little rising time. Check the dough’s expansion before baking and verify that the yeast is still active.
Bread that collapses
The dough may have risen too far, become too wet, or lacked enough structure. Try a shorter final proof or a little less water, depending on what the dough looked like.
A gummy center
The loaf may be underbaked or cut while hot. Bake until the center is set, then cool fully on a wire rack before slicing.
A pale crust
The oven may not have been fully preheated, or the loaf may need more baking time. Check the oven temperature and keep within the container’s temperature limit.
A dry loaf
Too much flour, too little water, or overbaking may be the cause. Weigh ingredients and check the loaf near the expected end of baking.
How to Tell When Bread Is Done
A golden crust is a useful clue, but color alone does not confirm that the middle is baked. The loaf should feel set rather than soft and doughy. If you have a suitable food thermometer, many lean wheat breads are commonly checked for an internal temperature around 190 to 210 degrees Fahrenheit, depending on the formula and desired crumb.
Do not use a thermometer reading as a substitute for safe handling or for checking that the loaf has the right texture. When in doubt, allow a little more baking time while watching the crust and staying within the manufacturer’s temperature limit. A loaf that is removed too early may have a damp line through the middle.
Check the center
Look for a set crumb rather than wet dough. Rye and sourdough loaves can remain moist, so cooling time matters.
Cool on a rack
Airflow under the loaf helps moisture escape and reduces the chance of a soggy base.
Care, Cleaning, and Safe Use
Clean the silicone container after each use and let it dry fully before storage. Follow the care directions supplied with your model. The standard product is described as dishwasher safe, but hand washing with warm water and mild dish soap is also a simple option when dough has dried around the folds.
Do not use the container directly over an open flame or place it on a stovetop burner. Avoid the oven grill or broiler if the manual warns against it, since close contact with a heating element can damage silicone. The product’s stated maximum temperature is a limit, not a recommended setting for every recipe.
When baking ends, use oven mitts and open the flexible lid or sides carefully. Hot steam can collect inside the partly closed container and may burn your hands or face. Place the hot container on a suitable heat-resistant surface and keep children away while removing the loaf.
Source: banana-breads.com
Before the first use
Wash the container as directed by the manufacturer and check it for damage.
After baking
Let it cool before cleaning, remove crumbs and stuck dough, and dry it before putting it away.
Before each bake
Check the container for cuts, tears, or other damage, and confirm that the oven setting is within the model’s rated range.
How to Store Homemade Bread
Let the loaf cool fully before storing it. For bread you plan to eat within a day or two, a clean bread bag or bread box can help limit drying. Refrigeration often makes bread stale faster, so it is not usually the first choice for ordinary lean bread unless the room is very warm or storage conditions require it.
For longer storage, slice the cooled loaf and freeze the portions in a well-sealed freezer bag. Take out only what you need and toast or thaw the slices. Freezing is useful when a small loaf is more than your household can finish while fresh.
For sandwiches
Cool the loaf completely before slicing so the pieces hold together.
For the freezer
Slice first if you want to remove single portions without thawing the entire loaf.
Choosing the Best Recipe for Your First Bake
Start with white bread if you want to learn the feel of a basic wheat dough. Move to whole wheat when you are comfortable judging water needs and proofing. Rye is useful when you want a more robust flavor, while multiseed bread adds texture without requiring a completely different method.
Sourdough is worth trying when you already have an active starter and can give the dough enough time. It is less predictable than a simple yeast loaf because fermentation depends on the starter and the room. The best first recipe is the one that fits your time, ingredients, and experience, not the one with the longest ingredient list.
Source: banana-breads.com
Choose white bread
Best for learning how to knead, shape, proof, and bake a basic loaf.
Choose whole wheat
Best for a deeper grain flavor and a loaf suited to daily toast and sandwiches.
Choose rye
Best for a savory loaf with a denser texture and a distinct grain taste.
Choose multiseed
Best for added crunch and flavor while keeping a wheat-based dough.
Choose sourdough
Best for bakers who maintain a starter and are comfortable judging a slower rise.
A Simple Plan for Your Next Loaf
Write down the recipe and weigh each ingredient before mixing. Note how long the first rise takes and what the dough looks like before shaping. After baking, record the crust color, crumb texture, and any changes you would make next time.
Make one small change per batch. If the loaf is dense, check proofing and flour measurement before adding extra yeast. If it is dry, check the water amount and baking time before changing the flour. Small, clear adjustments help you learn faster than changing several ingredients at once.
First batch
Bake the basic white loaf and focus on dough texture and proofing.
Second batch
Try whole wheat or a modest seed addition and note how the dough changes.
Later batches
Experiment with rye or sourdough after you can judge when a dough is ready to bake.
Frequently Asked Questions
Q
Can I use regular bread recipes in a Lékué Bread Maker?
Yes, many hand-kneaded bread recipes can be adapted for the Lékué Bread Maker. Choose a loaf size that fits your container, check its maximum oven temperature, and leave enough room for the dough to rise. Recipes designed for an electric bread machine may use different timing and methods, so follow the dough-making and oven-baking steps rather than assuming the machine program will apply.
Q
Does the Lékué Bread Maker bake bread without an oven?
The standard Lékué Bread Maker is a silicone container, not an electric bread machine. You still need to mix and knead the dough, allow it to rise, and bake it in an oven. Check the instructions for your exact model before using it with any other appliance.
Q
Why is my bread sticking to the Lékué container?
Dough can stick when it is very wet, the loaf has not baked enough, or bread is removed before it has cooled slightly. Let the container cool enough to handle safely, then flex the silicone gently to release the loaf. Do not cut the bread while it is still inside the container. If sticking continues, check the recipe, baking time, and care instructions rather than assuming the silicone needs a coating.
Q
Can I make gluten-free bread in the Lékué Bread Maker?
You can bake a gluten-free dough in suitable oven-safe silicone bakeware, but a gluten-free recipe needs a different formula. Without gluten, dough often relies on binders such as psyllium husk or xanthan gum for structure. Use a tested gluten-free bread recipe sized for your container, check the manufacturer’s guidance, and keep the container and utensils free from gluten cross-contact if that matters for your needs.
Q
How do I know when the dough has risen enough?
Look for visible expansion, a lighter feel, and small signs of air in the dough. Many wheat loaves grow close to twice their starting size during the first rise, but the exact amount varies with flour, yeast, and temperature. Rye and sourdough may behave differently. If the dough has become fragile and starts to sink, it may have risen too far.
Q
Can I bake frozen dough in the Lékué container?
It is better to thaw frozen dough safely and allow it to finish proofing before baking unless you have a recipe designed for baking from frozen. Dough needs time to soften and ferment, and putting a cold or frozen mass straight into the oven can lead to uneven baking. Follow the recipe’s thawing instructions and make sure the dough is ready before heating the oven.
✦ Wrapping Up
Conclusion
Lékué bread maker recipes offer a simple way to make homemade bread without moving dough through several bowls and pans. A basic white loaf is a useful starting point, while whole wheat, rye, multiseed, and sourdough recipes give you room to try new flavors. Good bread still depends on careful measuring, proper fermentation, and an oven that stays within the container’s stated limits.
Pay attention to the dough rather than following the clock alone. A soft, elastic wheat dough, a well-timed rise, and a fully baked center will usually matter more than adding extra ingredients. Let the loaf cool before slicing, and keep notes so you can improve each batch.
💡 Key Takeaway
Begin with the white bread recipe, weigh the ingredients in grams, and watch how the dough changes during both rises. Once you can make a loaf with a set center and a crust you like, try whole wheat or add a small amount of seeds. Always check the instructions and temperature limit for your exact Lékué model.