Recipes for a Lekue bread maker work best when you mix the dough, place it in the silicone baking container, and bake it in a conventional oven. Start with a simple white loaf, then try whole wheat, rye, herb, or gluten-free bread. Follow the instructions for your exact Lekue model, since its size and design can affect the amount of dough it holds.
Homemade bread is a welcome treat in many American kitchens. A warm loaf can go with soup on a cold evening, make a good sandwich for lunch, or turn a simple breakfast into something special. You do not need a large electric bread machine to enjoy fresh bread at home. A Lekue silicone bread maker can help you mix, shape, and bake a loaf with less fuss and fewer dishes.
The main thing to understand is that a Lekuesilicone bread maker is not the same as an automatic bread machine with a motor and heating element. Many Lekue bread makers are oven-safe silicone containers designed to hold dough while it bakes. You still need to measure the ingredients, mix the dough, allow yeast bread to rise when required, and use a suitable oven. Check the instructions supplied with your model for its temperature limits and handling rules.
This guide shares practical recipes for lekue bread maker users who want to make everyday white bread, whole wheat bread, rye bread, garlic herb bread, and a simple gluten-free loaf. Each recipe includes ingredient amounts, preparation steps, and signs that help you judge whether the dough and finished loaf are on track. These are adaptable home-baking formulas, not claims that every recipe comes from the manufacturer’s official recipe book.
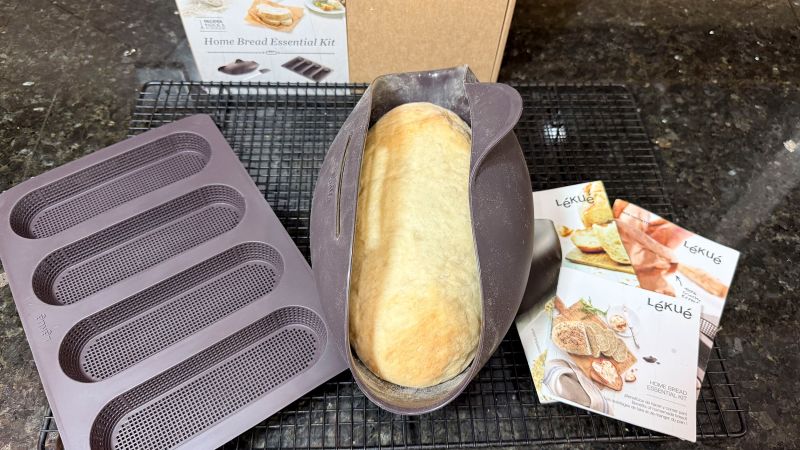
A Lekue bread maker is a reusable baking tool made from food-contact silicone. Depending on the model, it may have a flexible base and lid that help contain the dough during baking. The flexible shape can make it easier to remove a loaf than it would be from some rigid baking pans.
The name can cause confusion because a traditional electric bread machine mixes, kneads, rises, and bakes bread through an automatic program. A silicone Lekue bread maker does not automatically perform those tasks. You usually prepare the dough yourself and rely on your oven for the baking stage.
Before you begin, read the instructions for your specific product. Do not assume that every Lekue container has the same capacity, temperature limit, lid design, or handling instructions. Use only the oven settings approved for that model, and avoid placing it near an open flame or a heating element unless the manufacturer’s directions explicitly allow the intended use.
Source: media.cnn.com
Mix and prepare
Measure the ingredients, combine them, and knead or mix the dough according to the recipe.
Allow the dough to rise
For yeast bread, give the dough enough time to expand before baking. A container does not replace the need for fermentation.
Bake in an approved oven
Use the temperature and baking method recommended for your model and recipe. The silicone container itself does not produce heat.
Cool before slicing
Remove the loaf according to the manufacturer’s directions and let it cool on a rack before cutting.
What You Need Before Baking
Most of the equipment is already found in a basic home kitchen. You need a kitchen scale or measuring cups, measuring spoons, a mixing bowl if your model does not support mixing in the container, a spoon or dough scraper, and an oven. A kitchen scale is especially helpful when you want to repeat a loaf with the same texture.
Keep a clean work surface ready and make sure the oven rack is in a position that allows the container to sit flat. If the silicone container is very flexible, follow the manufacturer’s instructions about supporting it during transfer. A firm tray may be appropriate if the instructions permit it.
Ingredients
Use fresh flour, yeast that is still active, clean water, and salt measured as directed.
Tools
Have a scale, measuring spoons, a dough scraper, oven mitts, and a cooling rack ready.
Safety check
Confirm the container’s oven rating and the recipe’s temperature before preheating.
Easy Lekue White Bread Recipe
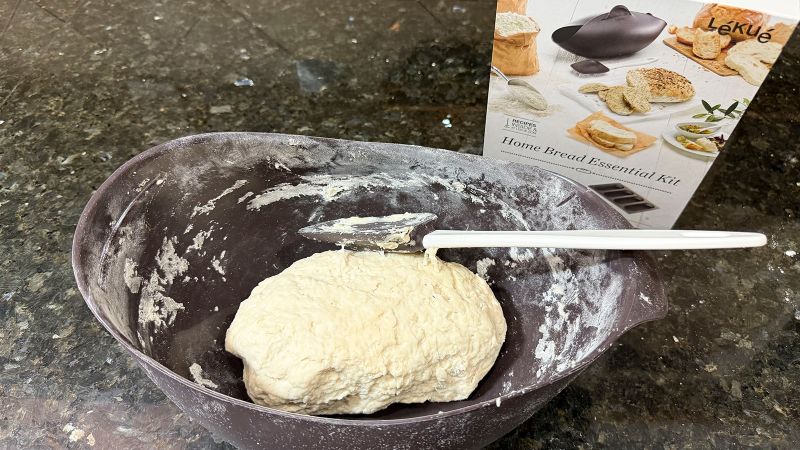
A simple white loaf is a good first recipe because it uses common ingredients and gives you a clear sense of how yeast dough should feel. This formula makes one small to medium loaf, but the amount must fit within the capacity of your exact container. If the recipe is too large for your model, divide it into smaller portions or reduce the ingredients proportionally.
The dough should feel soft and slightly tacky after kneading. It should not be so dry that it cracks, nor so wet that it behaves like a pourable batter. Flour brands and humidity can change how much water the dough needs, so hold back a little water at first and add it gradually if the dough feels too firm.
Source: 2.bp.blogspot.com
Prep time
Allow about 15 to 25 minutes for measuring, mixing, and kneading.
Rise time
Plan for roughly 60 to 90 minutes for the first rise, with more time if your room is cool.
Bake time
Use about 30 to 40 minutes as an initial planning range, then adjust to your oven, loaf size, and model instructions.
Ingredients
Use the following amounts as a starting formula for one modest loaf. Check the capacity of your container before mixing the full batch.
All-purpose or bread flour
3 cups, about 360 grams when weighed using a typical flour conversion.
Warm water
1 cup, about 240 milliliters, plus a little extra if needed.
Instant yeast
2 teaspoons.
Salt
1 teaspoon.
Sugar
1 tablespoon, optional but useful for flavor and browning.
Olive oil or neutral oil
1 tablespoon.
How to Make the White Loaf
1. Mix the flour, yeast, salt, and sugar in a bowl. Keep the salt from sitting directly on a small pile of yeast before mixing, as concentrated contact can slow yeast activity.
2. Add the warm water and oil. Stir until the flour is moistened and a rough dough forms. If using active dry yeast, follow its package directions, which may call for dissolving it in water first.
3. Knead the dough on a lightly floured surface for about 8 to 10 minutes, or until it feels smoother and more elastic. Add flour in small amounts only when needed, since too much can make the loaf dry.
4. Place the dough in a lightly oiled bowl, cover it, and let it rise until it has expanded noticeably. The exact time depends on the yeast, dough temperature, and room conditions. Watch the dough rather than relying only on the clock.
5. Gently press out some of the large air pockets, shape the dough into a compact loaf, and place it in the Lekue container as directed for your model. Leave enough room for the dough to rise without overflowing.
6. Let the shaped dough rise again until it looks puffy. Preheat the oven to 375 degrees Fahrenheit if that temperature is within your model’s approved range and suits the loaf size.
7. Bake for about 30 to 40 minutes as a starting point. If the top browns too quickly, consult your model’s instructions before changing the lid position or using a cover. The loaf should feel firm, and the center should be fully baked.
8. Remove the container carefully with oven mitts. Transfer the bread to a cooling rack using the recommended method, then allow it to cool before slicing.
Signs of success
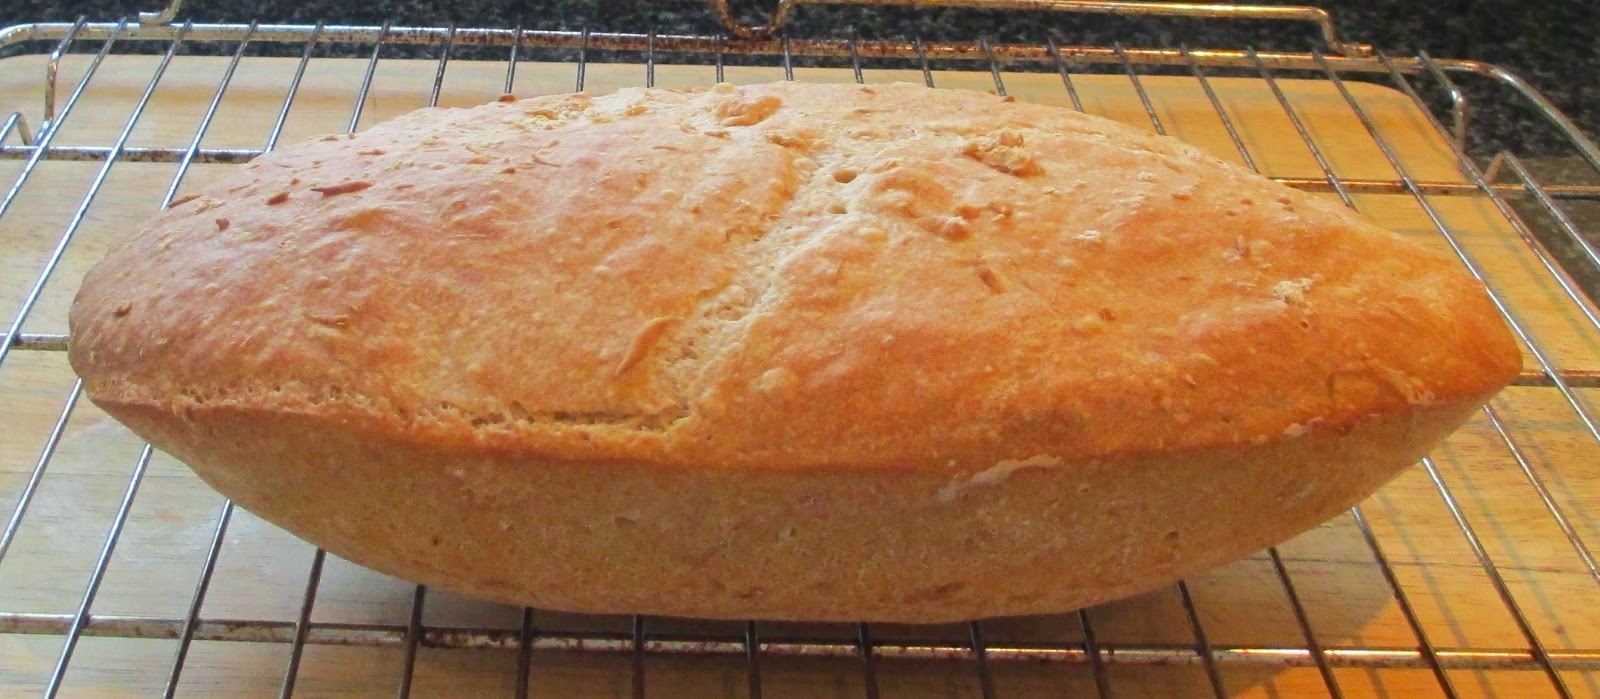
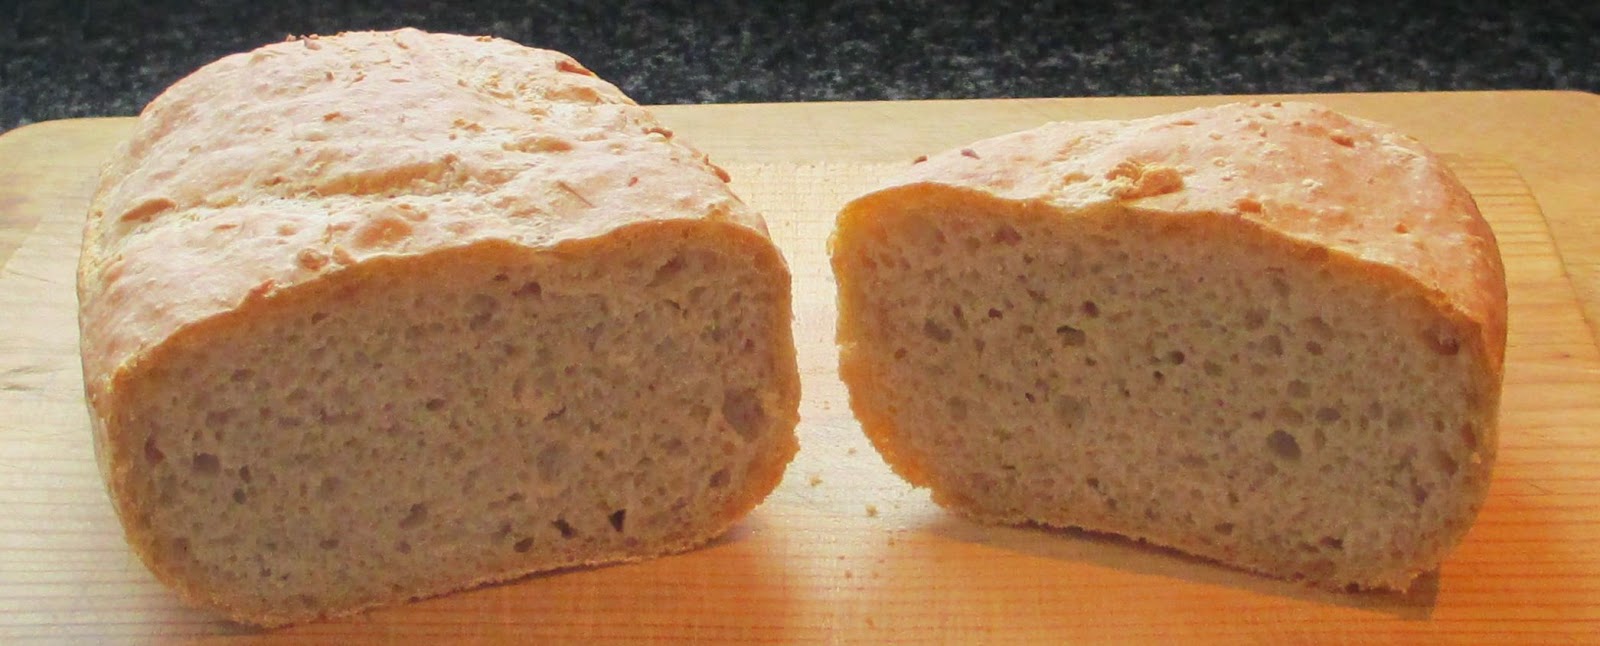
The loaf has an even golden crust, a cooked center, and a soft crumb that does not look wet or compressed.
If the dough barely rises
Check yeast freshness, water temperature, and room warmth before adding more yeast to the same batch.
Whole Wheat Bread for Everyday Meals
Whole wheat bread adds a fuller grain flavor and a denser texture than a loaf made only with white flour. Whole wheat flour contains the bran and germ, which affect how the dough absorbs water and how easily the gluten network stretches. A blend of whole wheat and bread flour is often easier to handle than a loaf made entirely from whole wheat flour.
This recipe works well for toast, sandwiches, and serving with soup. Give the flour time to absorb the water before deciding that the dough needs more. Whole wheat dough may feel sticky at first and become easier to handle after a short rest.
Source: thebreadshebakes.com
Whole wheat flour
2 cups, about 240 grams.
Bread flour
1 cup, about 120 grams.
Water
1 1/4 cups, about 300 milliliters, with a small amount held back.
Instant yeast
2 teaspoons.
Salt
1 teaspoon.
Honey or sugar
1 tablespoon.
Oil
1 tablespoon.
Preparation Steps
Mix both flours with the yeast and salt. Add the honey, oil, and most of the water, then stir until a rough dough forms. Add the remaining water only if the mixture feels too dry to come together.
Knead for about 8 to 10 minutes. The dough may remain slightly tackier than white bread dough. Cover it and let it rise until it has grown noticeably, often around 60 to 90 minutes in a moderately warm room.
Shape the dough and place it in the container, leaving space for a second rise. Once it looks puffy, bake at a suitable temperature approved for your model. A starting point of 375 degrees Fahrenheit may work for a modest loaf, but the exact baking time depends on its size and your oven.
Cool the loaf fully before cutting. Whole wheat bread can seem moist while hot, so slicing too early may make the center look gummy even when the loaf has baked properly.
For a softer loaf
Use the flour blend as written and avoid adding large amounts of extra flour during kneading.
For more grain flavor
Replace some of the bread flour with additional whole wheat flour, then adjust the water gradually and expect a denser loaf.
Rustic Rye Bread in a Lekue Container
Rye bread has an earthy flavor that pairs well with cheese, soup, eggs, and savory sandwiches. Rye flour behaves differently from wheat flour because it contains less of the gluten-forming proteins needed for a stretchy dough. A rye loaf can therefore feel stickier and have a tighter crumb than a standard white loaf.
For a first attempt, blend rye flour with bread flour rather than using only rye. This makes the dough easier to shape and gives the loaf more structure. Rye flour also absorbs water differently, so avoid adding too much extra flour just to make the dough feel like white bread dough.
Source: 1.bp.blogspot.com
Bread flour
2 cups, about 240 grams.
Rye flour
1 cup, about 120 grams.
Water
1 cup, about 240 milliliters, with a little extra available.
Instant yeast
2 teaspoons.
Salt
1 teaspoon.
Molasses
1 tablespoon, optional.
Caraway seeds
1 teaspoon, optional.
Mixing and Baking Rye Dough
Combine the flours, yeast, salt, and caraway seeds if using them. Add the water and molasses, then stir until no dry flour remains. Knead gently for several minutes until the dough becomes more cohesive. Rye dough may stay tacky, so use a scraper rather than adding handfuls of flour.
Cover the dough and allow it to rise until visibly expanded. Shape it with damp hands if needed, then transfer it to the Lekue container. Let it rise again until puffy, but do not wait so long that it collapses.
Bake in an oven at a temperature permitted by your container’s instructions. A starting point around 375 degrees Fahrenheit may suit a modest loaf, though a dense rye loaf can need a different time from white bread. Check the center for doneness and cool the loaf thoroughly before slicing.
Rye bread often cuts more cleanly after it has cooled for several hours. If the crumb seems sticky immediately after baking, let it cool fully before deciding whether the recipe needs more flour or a longer bake.
Best texture tip
Use a sharp serrated knife and let the loaf cool completely before making thin slices.
Flavor variation
Try a small amount of caraway or a tablespoon of molasses, but keep the dough’s moisture balance in mind.
Garlic and Herb Bread
Garlic and herb bread brings extra flavor to a plain loaf without changing the basic baking method. It works well beside pasta, roasted vegetables, or a bowl of tomato soup. Dried herbs are easy to mix into the dough, while fresh herbs give a brighter flavor.
Use the white bread formula as the base, then add herbs and garlic. Keep wet additions modest. Too much oil or moisture from fresh ingredients can change the dough’s texture and make the loaf harder to bake through.
Source: raveandreview.com
Base dough
Use the ingredients and method from the white bread recipe.
Garlic
Add 1 to 2 finely minced cloves, or use a small amount of garlic powder.
Dried herbs
Add 1 to 2 teaspoons of Italian herb blend, oregano, or rosemary.
Olive oil
Keep the oil near the amount in the base recipe rather than adding several extra tablespoons.
How to Add Garlic and Herbs
Mix the dried herbs into the flour before adding the water. Add finely minced garlic with the wet ingredients, spreading it through the dough as you mix. If you prefer a mild flavor, start with one clove and increase it in later batches.
Knead the dough until it is smooth enough to shape, then follow the same two-rise method used for white bread. Fresh rosemary can have a strong flavor, so chop it finely and use a modest amount.
Bake according to the approved temperature range for your Lekue model and the loaf size. Let the loaf cool before slicing. For a stronger garlic flavor at the table, serve the bread with a separate garlic butter rather than adding excess fat to the dough.
Avoid wet clumps
Spread chopped herbs and garlic evenly through the dough instead of leaving large pockets of filling.
Try other flavors
Small amounts of black pepper, dried thyme, or grated hard cheese can add variety, but too much cheese or moisture may affect the crumb.
A Simple Gluten-Free Bread Recipe
Gluten-free bread needs a different formula from wheat bread. Without gluten, dough does not develop the same stretchy network that traps gas and supports a tall loaf. Many gluten-free recipes use a flour blend with starches, a binder such as psyllium husk or xanthan gum, and enough water to make a thick, cohesive mixture.
The recipe below is a general starting point, not a guaranteed replacement for a tested formula from a gluten-free baking source. Different flour blends absorb water at different rates, and some already contain a binder. Read the blend’s instructions before adding more. If the bread is intended for someone with celiac disease, take steps to avoid cross-contact with wheat flour, shared utensils, and unclean work surfaces.
Source: i.pinimg.com
Gluten-free flour blend
2 1/2 cups, about 350 grams depending on the blend.
Warm water
About 1 1/2 cups, or 360 milliliters, adjusted to the blend.
Instant yeast
2 teaspoons.
Salt
1 teaspoon.
Sugar
1 tablespoon.
Oil
2 tablespoons.
Binder
Use the amount specified by the flour blend or a reliable recipe. Do not add xanthan gum or psyllium automatically if the blend already includes a suitable binder.
Gluten-Free Method
Mix the flour blend, yeast, salt, and sugar in a clean bowl. Add the water and oil, then stir until the mixture forms a thick, even dough or batter. Gluten-free bread mixtures are often much wetter than wheat dough, so do not add flour simply because the mixture feels sticky.
Transfer the mixture to the Lekue container according to the product instructions. Smooth the top with a damp spoon, cover only as directed, and allow it to rise until it has expanded. Some gluten-free doughs show less dramatic expansion than wheat dough, so follow the chosen formula’s signs of readiness.
Bake using the temperature recommended by the gluten-free recipe, provided it is within the silicone container’s approved range. Allow the loaf to cool fully before cutting. The center needs time to set, and slicing it while warm can make it seem underbaked.
If the loaf falls or remains gummy, check the flour blend, binder, water amount, rise, and bake time before changing several ingredients at once. A recipe developed for a different blend may need a full adjustment rather than a simple flour swap.
Prevent cross-contact
Use clean bowls, tools, and surfaces, and verify that every ingredient is suitable for the intended gluten-free diet.
Check the center
A browned crust does not guarantee that the inside is set. Cool the loaf fully and assess its crumb before changing the next batch.
How to Adjust Bread Recipes for Your Lekue Model
The shape and capacity of your container matter as much as the recipe. A dough batch that fits one model may overflow another during the second rise. Always compare the recipe’s dough quantity with the capacity and instructions for the container you own.
When changing a recipe, adjust one factor at a time. If you scale every ingredient proportionally, the dough’s basic ratio stays similar, but the rise time and baking time may still change because the loaf has a different size or shape. Use the recipe’s visual signs and the manufacturer’s guidance rather than assuming the same timer will work for every batch.
Source: store.inoutcooking.com
If the dough rises too high
Reduce the batch size next time and leave more room for expansion. Do not force the lid closed over overflowing dough.
If the loaf is too flat
Check whether the dough was too wet, the container was too large for the batch, or the dough rose too long.
If the crust is pale
Check the oven setting and bake progress. Do not exceed the silicone product’s rated temperature to force faster browning.
If the bottom is damp
Allow enough baking time for the center to cook, then cool the loaf on a rack so moisture can escape.
A Quick Recipe Adjustment Table
Use this table to guide your next batch. These are general troubleshooting ideas, not fixed rules for every model or recipe.
Dry, crumbly dough
Add water one teaspoon or tablespoon at a time, depending on the batch size, until the flour comes together.
Very sticky wheat dough
Rest the dough briefly before adding flour. If it remains hard to handle, add a small amount of flour and knead again.
Dense loaf
Check yeast activity, kneading, rise time, and whether the dough was over-floured.
Collapsed top
Check for overproofing, excess water, or a loaf that was too large for the container.
Gummy crumb
Check the center for doneness and let the loaf cool fully before slicing.
Common Bread-Making Mistakes to Avoid
Most bread problems come from a small group of causes: poor yeast activity, incorrect water balance, rushed rising, excess flour, or a loaf that needs more time in the oven. Change one variable at a time so you can tell what improved the result. Keep a brief note of ingredient weights, room conditions, rise time, and bake time after each batch.
A flexible silicone container can make handling easier, but it does not correct dough that is too wet or underproofed. Learn how the dough looks and feels at each stage. These signs are more useful than following a timer without checking the loaf.
Source: media.cnn.com
Using water that is too hot
Very hot water can damage yeast. Use the temperature advised by the yeast package and recipe, and avoid guessing with boiling or very hot tap water.
Adding too much flour
A dry dough can produce a heavy loaf. Add flour sparingly and weigh it when possible.
Skipping the second rise
Many yeast loaves need a final rise after shaping. Baking too early can lead to a tight, dense crumb.
Letting the dough rise too long
Overproofed dough can lose strength and collapse. Bake when it has expanded as the recipe directs rather than waiting for the largest possible size.
Cutting bread too soon
Hot bread releases steam and its crumb is still setting. Let the loaf cool before slicing, especially for rye and gluten-free recipes.
Ignoring model instructions
Do not exceed the stated oven limit, use an unapproved heat source, or handle hot silicone without suitable protection.
How to Tell When Bread Is Done
A golden crust is useful but not enough on its own. The loaf should feel set, and the center should not have raw, paste-like dough. For a more objective check, a suitable food thermometer can help assess the internal temperature of a wheat loaf. Many standard wheat breads are fully baked around 190 to 210 degrees Fahrenheit, depending on the recipe and loaf style. This range is a general baking guide, not a universal rule for every gluten-free or specialty loaf.
If the crust looks done while the center remains underbaked, review the oven temperature, loaf size, and baking time. Do not increase the heat beyond the container’s approved limit. If the outside browns too fast, a lower permitted temperature and a longer bake may be appropriate for the next batch.
Use more than color
Check the center and crumb as well as the crust. Let the loaf cool before judging its final texture.
Keep a baking log
Record flour type, ingredient weights, room temperature if known, rise time, oven setting, and the result.
Storage, Cleaning, and Leftover Bread
Proper cooling and storage help keep homemade bread pleasant to eat. Let the loaf cool fully before packing it, since trapped steam can soften the crust and create excess moisture. Store the bread in a clean bread bag or suitable container at room temperature if you expect to eat it within a few days.
Homemade bread does not contain the same preservatives as many packaged loaves. Check it for mold and discard the whole loaf if mold appears. Do not rely on cutting away the visible spot, because mold can spread beyond the area you can see.
For longer storage, slice the cooled loaf and freeze the slices in a well-sealed freezer bag or container. You can toast individual slices straight from frozen or thaw them as needed. This approach is useful when a small household cannot finish a whole loaf before it becomes stale.
Source: i.pinimg.com
Room-temperature storage
Keep bread covered in a clean, dry container and use it while its texture and condition remain good.
Freezing
Freeze fully cooled bread in portions so you can remove only what you need.
Cleaning the Lekue container
Follow the model’s care instructions. Use a suitable mild detergent and a soft sponge, and avoid sharp tools that could damage the silicone.
Before storing the container
Wash away crumbs and grease, rinse well, and dry it fully. Check the manufacturer’s instructions before using a dishwasher.
What to Do With Stale Bread
Bread that has become firm but shows no signs of spoilage can still be useful. Cut it into cubes for croutons, pulse it into breadcrumbs, or use it in a bread pudding or baked breakfast dish. These ideas work especially well with plain white and whole wheat loaves.
Do not use bread that has mold or an unusual smell. Freezing bread before it becomes stale is the better option when you already know that you will not finish the loaf in time.
Croutons
Cut bread into cubes, toss with a modest amount of oil and seasoning, then bake until dry and crisp.
Breadcrumbs
Dry bread fully, then crush or process it into crumbs for use in suitable recipes.
French toast
Use firm slices in a standard egg-and-milk mixture and cook them thoroughly in a skillet.
Choosing the Best Recipe for Your First Loaf
Start with white bread if you want to learn how yeast dough behaves. It gives you a simple base for later changes and makes it easier to spot problems caused by water, flour, or rising time. Once you can make a loaf with a good rise and an even crumb, try whole wheat or herb bread.
Choose rye when you want a stronger grain flavor and do not mind a tighter crumb. Choose gluten-free bread when you need a formula that fits the required diet, and pay close attention to the flour blend and cross-contact controls. No single recipe will suit every taste, container size, and dietary need.
Source: thebreadshebakes.com
Best for beginners
White bread offers a familiar dough texture and a clear starting point for learning.
Best for a hearty sandwich
Whole wheat bread adds a fuller grain taste and works well with savory fillings.
Best for bold flavor
Rye bread with a little caraway or molasses offers a more earthy taste.
Best for a savory meal
Garlic herb bread adds flavor without requiring a separate bread-making method.
Best for gluten avoidance
Use a reliable gluten-free recipe and suitable ingredients, with careful attention to cross-contact.
A Simple Plan for Better Results
Bake the same white bread recipe twice before making large changes. Weigh the ingredients, note how long the dough takes to rise, and record the final baking time. This gives you a useful baseline for your oven and container.
After that, change one thing at a time. Swap part of the flour, add herbs, or adjust the water in a small amount. If a loaf fails, compare your notes instead of changing the yeast, flour, water, and temperature all at once.
First batch
Use the basic white loaf and follow the model instructions.
Second batch
Repeat the same formula and confirm whether the rise and texture are consistent.
Third batch
Try one variation, such as whole wheat flour or dried herbs, and record the result.
Frequently Asked Questions
Q
Can I use a Lekue bread maker without an electric bread machine?
Yes. Many Lekue silicone bread makers are designed for use in a conventional oven, so you do not need an automatic electric bread machine. You must still mix the dough, allow yeast dough to rise when required, and bake it in an oven. Check the instructions for your exact model before use.
Q
Do I need to knead dough for a Lekue bread maker?
Most traditional yeast bread recipes need some form of kneading to help develop structure. White and whole wheat doughs can usually be kneaded by hand or with a suitable mixer. Gluten-free bread follows a different method and often needs thorough mixing rather than traditional kneading. Use the method that matches the recipe.
Q
What temperature should I use for Lekue bread recipes?
The correct temperature depends on the recipe, loaf size, and the oven limits of your particular Lekue model. Around 375 degrees Fahrenheit can be a reasonable starting point for some standard wheat loaves, but it is not a universal setting. Follow both the recipe and the manufacturer’s temperature instructions, and never exceed the product’s approved limit.
Q
Why does my homemade bread turn out dense?
Dense bread can result from inactive yeast, too much flour, insufficient kneading, a short rise, or dough that has risen too long and collapsed. Check the yeast date, measure flour by weight when possible, and watch the dough during both rises. Make one change at a time to identify the likely cause.
Q
Can I make sourdough in a Lekue bread maker?
A suitable oven-safe Lekue container can be used for some sourdough loaves if the model’s instructions allow it. Sourdough needs an active starter and a recipe with fermentation and proofing steps suited to that starter. Its rise time may vary with starter strength, dough temperature, and flour type, so follow a reliable sourdough formula rather than substituting sourdough starter directly for yeast in equal amounts.
Q
Can I put the Lekue silicone bread maker in the dishwasher?
Dishwasher suitability depends on the exact product model. Read the care instructions that came with the container before putting it in a dishwasher. If you are unsure, wash it by hand with mild detergent and a soft sponge, rinse it well, and dry it before storage.
Q
How do I keep bread from sticking to a silicone container?
Follow the manufacturer’s instructions about whether the container needs oiling. Some silicone baking products release bread easily without added grease, but results can vary with the dough and condition of the container. Let the loaf rest as directed after baking and release it gently. Do not use a knife or sharp tool against the silicone.
✦ Wrapping Up
Conclusion
Recipes for Lekue bread maker users can range from simple white bread to whole wheat, rye, garlic herb, and gluten-free loaves. The best place to begin is a basic wheat dough with measured ingredients and a clear rising method. Once you understand how the dough should look and feel, you can adjust the flour and flavors to suit your meals.
Keep the capacity and temperature limits of your exact Lekue model in mind. The container helps hold the dough during baking, but good bread still depends on yeast activity, water balance, proper rising, enough oven time, and full cooling. Small, careful changes will teach you more than changing several parts of a recipe at once.
💡 Key Takeaway
Start with the white bread recipe, weigh the flour if possible, check the model instructions, and write down your rise and bake times. Use that first loaf as a baseline before trying whole wheat, rye, garlic herb, or gluten-free bread.