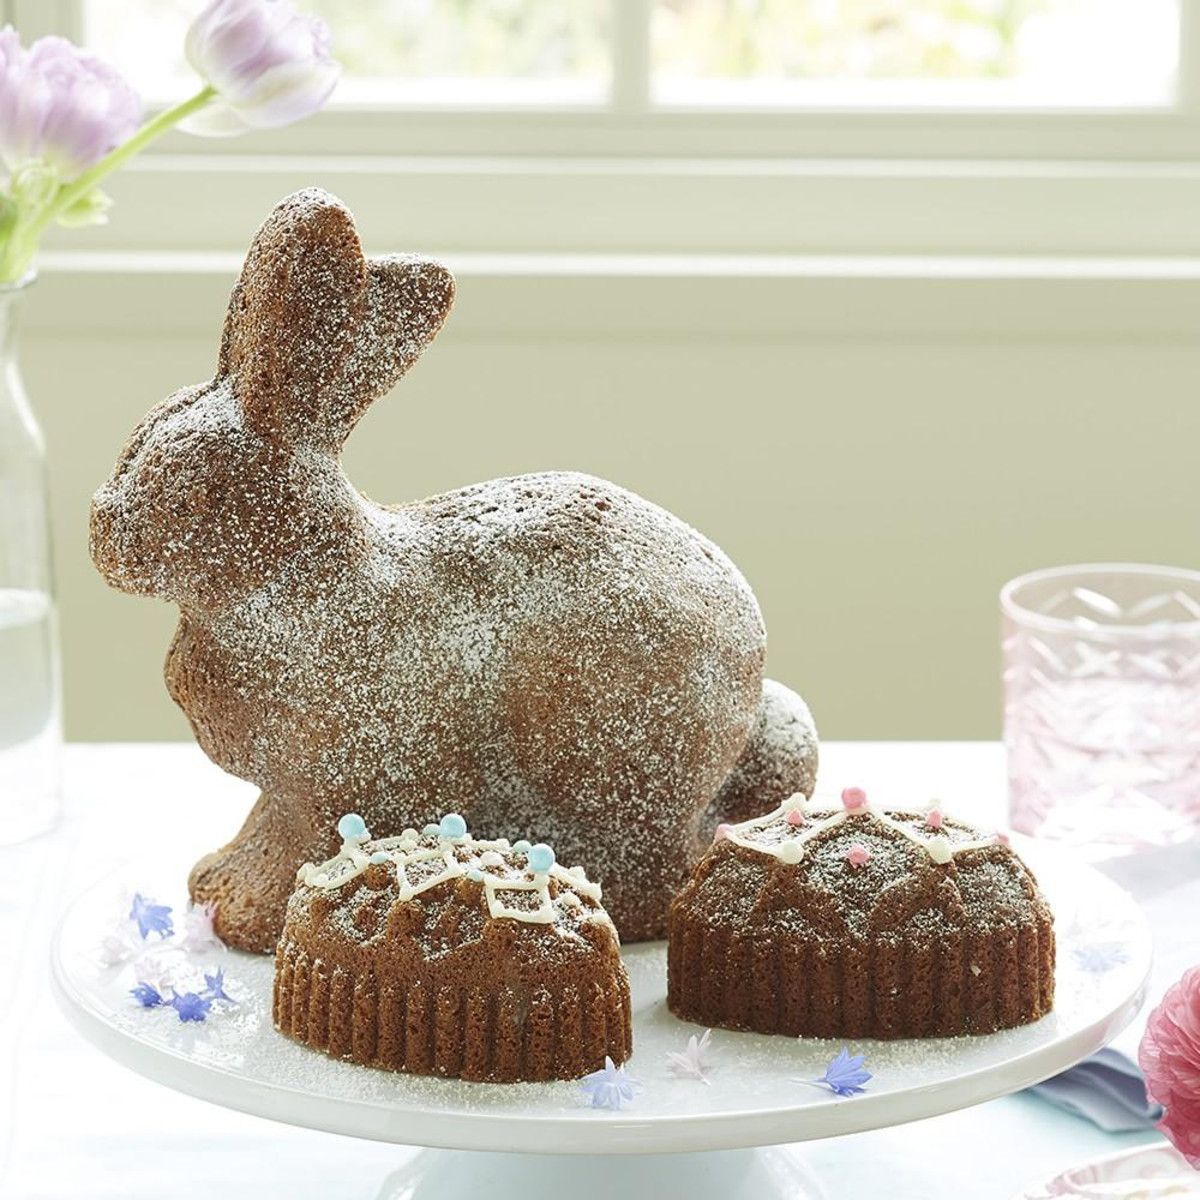
The best starting point for a Nordic Ware bunny cake pan recipe is a simple vanilla butter cake made with flour, sugar, butter, eggs, milk, baking powder, and vanilla. Grease every detail of the pan, fill each cavity no more than three-quarters full, and bake until a toothpick comes out clean. Let the cakes rest before removing them so their ears, faces, and other small details stay intact.
Easter baking is a familiar part of spring in many American homes. A bunny-shaped cake fits right in with Easter brunch, family dinners, school parties, and spring birthdays. The best part is that you do not need fancy ingredients or advanced cake skills to make one. A good batter, a well-prepared pan, and a little patience can help you turn a plain homemade cake into a fun dessert.
Nordic Ware makes several bunny-shaped baking pans, and they do not all work the same way. The Baby Bunny Cake Pan has six small cavities, while the classic 3D Bunny Cake Pan makes a larger, freestanding rabbit-shaped cake. The recipe below is designed as a practical starting point for small bunny cakes. It also explains how to adapt the method for a larger mold, choose a suitable batter, prevent sticking, and decorate the finished cake without hiding its shape.
Source: pinterest.com
Ingredients for a Nordic Ware Bunny Cake Pan Recipe
This vanilla cake recipe uses common ingredients found in many American kitchens. It is a useful choice for small bunny cakelets because the batter has enough structure to show the molded details. The texture is closer to a simple butter cake than a very light sponge cake. You can serve the cakes plain, add a thin glaze, or finish them with frosting and small candies.
The ingredient amounts below provide a starting point for a small batch. The Baby Bunny Cake Pan has a stated total capacity of 4.5 cups, but batter volume and baked cake volume are not the same. Depending on the pan, egg size, and mixing method, you may have a little batter left over. Do not force all the batter into the cavities if they are already three-quarters full.
Source: nordicrecipebox.com
All-purpose flour
Use 1 1/2 cups of all-purpose flour. Measure it with a kitchen scale or spoon it into a measuring cup and level the top. Too much flour can make the cakes dry and heavy.
Granulated sugar
Measure 1 cup of sugar. It adds sweetness and helps the butter mixture become light during mixing.
Unsalted butter
Use 1/2 cup of melted butter that has cooled slightly. It adds a rich flavor and helps create a tender crumb.
Milk
Add 1/2 cup of milk. Whole milk works well, but another plain milk can also work. The final texture may vary with the milk used.
Eggs
Use 2 large eggs. They help bind the ingredients and give the cakes structure.
Baking powder
Measure 1 teaspoon of baking powder for this small-batch formula. Check that it is fresh so the batter can rise as expected.
Vanilla extract
Add 1 teaspoon of vanilla extract for a warm, familiar cake flavor.
Salt
Use 1/4 teaspoon of salt to balance the sweetness and bring out the butter and vanilla flavors.
Optional cocoa powder
Add 2 tablespoons of unsweetened cocoa powder if you want chocolate-colored bunny cakes. For the most even result, mix the cocoa with the flour before adding the dry ingredients.
For preparing the pan
Have softened butter or vegetable shortening and a little flour ready. Baking spray that contains flour is another option when the pan instructions allow it.
Optional Ingredients for Flavor and Decoration
A little lemon zest can add a fresh note to the vanilla batter. For a warmer flavor, try a small pinch of cinnamon. Keep additions modest because too much liquid or a large amount of extra dry ingredients can change how the cake rises and releases from the mold.
For decoration, prepare powdered sugar, a simple icing, shredded coconut, or small candies. Pastel icing can highlight the ears and face, while a light dusting of sugar lets the molded shape remain the main feature. Wait until the cakes are fully cool before adding frosting or glaze.
Simple glaze
Mix 1 cup of powdered sugar with 1 to 2 tablespoons of milk or water. Add the liquid a little at a time until the glaze is thick enough to coat the cake without running straight off.
Chocolate finish
Use melted chocolate or a thin chocolate glaze after the cakes have cooled. Avoid applying hot chocolate to a delicate cake that has not fully set.
How to Make Bunny Cakes Step by Step
The key to a good result is careful pan preparation and even filling. Small molded cakes can brown before their centers finish baking, so keep an eye on the oven rather than relying on color alone. Set out the ingredients and tools before you start, and allow time for the cakes to cool before decorating.
Source: banana-breads.com
Step 1: Heat the oven
Preheat the oven to 350°F. Place a rack near the center so the pan receives even heat. Check the temperature limit for your exact Nordic Ware pan before baking.
Step 2: Prepare the pan
Brush softened butter or shortening into every cavity, including the ears, eyes, nose, and narrow corners. Dust with a thin layer of flour and tap out the excess. A baking spray that contains flour may be used if permitted by the manufacturer’s care instructions.
Step 3: Mix the butter and sugar
Place the melted butter and sugar in a mixing bowl. Beat until the mixture is evenly blended. Since the butter is melted, the texture will not be exactly the same as butter creamed while soft, but the mixture should have no dry pockets of sugar.
Step 4: Add the wet ingredients
Add the eggs and vanilla, then mix until combined. Pour in the milk and stir gently. If the mixture looks slightly uneven at this stage, do not keep beating it for a long time.
Step 5: Add the dry ingredients
In a separate bowl, mix the flour, baking powder, and salt. Add the dry mixture to the wet ingredients in stages. Stir only until the flour disappears. Too much mixing can make the finished cake tough.
Step 6: Fill the cavities
Spoon the batter into the prepared molds. Aim to fill each cavity no more than three-quarters full. Spread the batter gently into narrow sections, especially the ears, so air pockets do not leave gaps in the finished shape.
Step 7: Remove large air bubbles
Tap the pan gently on a folded kitchen towel over the counter. Do not bang it hard, as this can move the batter unevenly or damage a pan’s finish. Wipe any batter from the rim before placing the pan in the oven.
Step 8: Bake the cakes
Bake for about 20 to 30 minutes, checking the cakes near the earlier end of the range. The actual time depends on cavity size, batter depth, and oven performance. Insert a toothpick into the thickest part of a cake; it should come out clean or with a few moist crumbs.
Step 9: Cool before turning out
Place the pan on a wire rack and let the cakes rest for about 10 minutes. Loosen only if needed with a soft, nonmetal tool that will not scratch the surface. Turn the cakes out carefully and let them cool completely.
Step 10: Decorate and serve
Add glaze, frosting, coconut, or small candies once the cakes are cool. Use a small piping bag or a clean food-safe brush to add detail around the ears and face. Keep the decoration light if you want the molded features to remain visible.
How to Tell When the Cakes Are Done
Look for edges that have set and a top that springs back gently when touched. A toothpick inserted into the thickest part should not come out with wet batter. Do not judge doneness by browning alone, because the color can vary with the pan and oven.
If the center is still wet, return the pan to the oven for a few minutes and test again. If the edges are already dark, check the oven temperature and rack position before the next batch. An oven thermometer can help identify a difference between the set temperature and the actual oven heat.
Success sign
The cakes hold their shape, the centers are baked through, and the ears and facial details remain clear after release.
Warning sign
Wet batter on the tester, a sunken center, or a cake that breaks apart during release can point to underbaking, overfilling, or insufficient cooling.
Choosing the Right Nordic Ware Bunny Pan
The pan style changes the amount of batter you need, the baking time, and the way you serve the cake. Before using this recipe, check whether your pan makes six small cakelets or one large three-dimensional bunny. A recipe suited to one mold may not fill another correctly, even when both pans have a rabbit design.
The Baby Bunny Cake Pan has six small cavities and a stated total capacity of 4.5 cups. The classic 3D Bunny Cake Pan uses two halves to create a standing rabbit and has a stated total capacity of 6 cups. The Bunny in Basket 3D Cake Pan is another distinct design. Its product information describes a two-cavity mold for a larger centerpiece, so follow its own directions rather than assuming the smaller cakelet recipe will work unchanged.
Source: nordicware.com
Baby Bunny Cake Pan
Choose this style for several small cakes that can be served one per person. The molded details work well with a simple glaze or a light dusting of powdered sugar. Fill each cavity carefully and bake until the center is done.
Classic 3D Bunny Cake Pan
This two-piece mold creates a larger rabbit-shaped cake. A denser batter, such as a suitable pound cake or firm butter cake, is a better starting point than a very airy sponge that may not support its own shape.
Bunny in Basket 3D Cake Pan
This design creates a more elaborate centerpiece. Check its capacity, oven limit, filling directions, and assembly method before mixing the batter. Use the exact pan’s recommended recipe when available.
Can You Use a Boxed Cake Mix?
Yes, a boxed cake mix can be convenient, especially when you are baking with children or need to save time before an Easter meal. Read the pan instructions first, because some mixes make a softer cake that can be harder to release from a detailed mold. Do not assume that every standard cake mix will hold a standing 3D shape.
For a small cakelet pan, prepare the mix according to its package directions unless the pan maker gives different instructions for that mold. Fill each cavity no more than three-quarters full and bake according to the pan’s needs, checking for doneness early. Use any extra batter for cupcakes instead of overfilling the cavities.
For small cakelets
A standard vanilla or lemon cake mix can be a useful option, but expect the texture and release to vary by brand.
For a standing bunny
Use a recipe designed for a 3D cake mold or one that makes a firm, level cake. The batter must bake through without leaving weak spots that could break during assembly.
How to Make a 3D Bunny Cake That Holds Its Shape
A freestanding bunny cake needs more than a cute shape. Both halves must bake evenly, cool fully, and fit together without a large gap. A dense vanilla cake or pound cake is usually a better fit for this job than a very soft cake that crumbles when handled.
Use a recipe intended for your exact 3D mold whenever possible. The classic Nordic Ware 3D Bunny Cake recipe provides a separate method and baking time from the small cakelet recipe. Do not use the 20-to-30-minute cakelet range as the baking time for a large assembled bunny.
Source: nordicrecipebox.com
Prepare both halves
Grease and flour the inside of both mold halves. Make sure the coating reaches the ears, face, and all narrow sections. If the pan has a vent hole, follow the manufacturer’s directions for the correct orientation.
Fill the mold correctly
Follow the exact recipe for how much batter to place in each half. Many 3D designs need the ears filled fully while the remaining cavity stays around three-quarters full. Avoid leaving large empty pockets around the face.
Bake and cool
Set the mold on a sturdy baking sheet if the product instructions call for it. Bake for the recipe’s stated time and confirm doneness in the thickest section. Let the cake rest in the mold for the recommended period before removing it.
Level the halves
Once the cake is fully cool, use a serrated knife to trim any rounded sections that prevent the halves from meeting evenly. Work slowly and keep the cut surface as level as possible.
Join the cake
Spread a thin layer of firm buttercream on the cut side of one half and press the other half gently into place. Allow the frosting to firm before standing the cake upright. A suitable melted chocolate coating can also act as a binder when used carefully.
Add a stable base
Place the assembled bunny on a flat serving platter. A small dab of firm frosting can help anchor the base. If the cake leans or the join feels weak, lay it down and fix the seam before adding decorations.
How to Decorate a Standing Bunny
A simple coat of buttercream can cover small seams and help the cake look like one piece. Add shredded coconut for a soft, fluffy look, or use white frosting with pink details inside the ears. Small candies can mark the eyes and nose, while thin strips of icing can form whiskers.
Keep the weight of the decorations in mind. Large pieces of candy or thick layers of frosting can pull at a weak join. Let the assembled cake stand securely before carrying it to the table, and use a platter that is wide enough to support the base.
White bunny
Use white buttercream, coconut, and small pink or dark candy details for a classic Easter look.
Chocolate bunny
Use chocolate frosting or cocoa in a suitable batter. A little white icing around the eyes can help the face stand out.
Spring garden bunny
Add green-tinted frosting around the base and place small edible flower decorations nearby. Keep non-edible decorations separate from any surface that touches the cake.
Troubleshooting Common Bunny Cake Problems
Most problems with molded cakes come from sticking, uneven filling, excess rise, or removing the cake before it has set. Small details make these pans charming, but those same details can trap crumbs if the pan is not prepared well. Make one change at a time when troubleshooting so you can see what helped.
Source: pinterest.com
The cakes stick to the pan
Check whether butter or shortening reached every groove. Use flour or a baking spray that contains flour when the manufacturer’s directions allow it. Let the cakes rest for about 10 minutes before release, but do not leave them in the pan for an unusually long time without checking the recipe.
The bunny has a large bump
Too much batter or uneven filling can cause a raised center. Spread the batter gently into the cavity and leave enough room for expansion. For a 3D cake, follow the recipe’s directions for filling the ears and sides.
The ears break off
The cake may be underbaked, too delicate, or still too warm. Check doneness before removing it, allow the recommended cooling time, and turn the pan over carefully. If a small piece breaks, use a little frosting as edible glue after the cake has cooled.
The cakes are dry
They may have baked too long, or the flour may have been overmeasured. Check the cakes early and measure the ingredients with care. Avoid adding extra flour to make the batter feel thicker unless the recipe calls for it.
The face details look blurry
Air pockets, uneven pan coating, or excess batter can affect the shape. Brush the release coating into the fine details, tap the filled pan gently, and avoid filling past the recommended level.
The center is raw
The cake may need more time, or the oven may be running cooler than the set temperature. Return it to the oven and test again after a few minutes. Use an oven thermometer if the same problem occurs in later batches.
The 3D bunny leans
The two halves may not be level, the cake may be warm, or the frosting seam may not be firm. Trim the cut faces flat, let the cake cool fully, and give the join time to set before standing the bunny upright.
How to Clean and Store the Pan
Let the pan cool before washing it. Hand wash with warm, soapy water and a soft sponge, then dry it well. Avoid metal utensils, abrasive pads, and harsh scrubbing that can damage a coated surface. Follow the care instructions supplied with your exact model, since finishes and oven limits can differ.
Store the pan in a dry cupboard where heavy cookware will not scrape against its surface. Do not soak it for long periods unless the manufacturer says that is suitable. Clean, dry bakeware is easier to prepare for the next batch and less likely to collect residue in the small molded details.
Before the next bake
Check the cavities for old crumbs, dried grease, or coating damage. Prepare the pan again before every use, even when it has a nonstick finish.
Avoid common cleaning mistakes
Do not use sharp tools to scrape stuck cake from the mold. Soak briefly in warm soapy water if needed, then loosen the residue with a soft sponge.
Frequently Asked Questions
Q
What is the best cake recipe for a Nordic Ware bunny pan?
A vanilla butter cake is a useful starting point for small bunny cakelets because it has a simple flavor and a crumb that can show the molded details. For a standing 3D bunny, choose a denser cake recipe intended for that type of mold. The best batter depends on the pan’s size and shape.
Q
How full should I fill a Nordic Ware bunny cake pan?
For most bunny cakelet cavities, fill no more than three-quarters full. This leaves space for the batter to rise. A 3D mold may have extra directions for filling the ears and sides, so follow the recipe and instructions for that exact pan.
Q
Can I use a cake mix in a Nordic Ware bunny pan?
Yes, a boxed cake mix can work in many small molded pans. The texture varies by brand, and a very soft cake may be harder to remove without breaking. For a standing bunny, use a mix or recipe that produces a firm enough cake to hold its shape.
Q
Why is my bunny cake sticking even though the pan is nonstick?
A nonstick finish does not remove the need for proper preparation. Butter or shortening may have missed a narrow groove, or the cake may need more cooling time. Grease every detail and dust with flour, or use baking spray that contains flour when the manufacturer’s instructions permit it.
Q
How long does a Nordic Ware bunny cake take to bake?
Small bunny cakelets may take about 20 to 30 minutes at 350°F, depending on the pan, batter, and oven. A large 3D bunny can take much longer. Check the recipe for the exact mold and use a toothpick test rather than relying on time alone.
Q
How do I keep a 3D bunny cake from falling apart?
Use a suitable dense cake recipe, grease both mold halves well, and bake until the centers are done. Cool the cake fully before trimming and joining the halves. Apply a thin layer of firm frosting between them, let the seam set, and support the base on a flat platter.
Q
Can I make Nordic Ware bunny cakes ahead of Easter?
Yes. Bake the cakes ahead, let them cool completely, and store them in an airtight container. For longer storage, freeze undecorated cakes in suitable airtight wrapping and thaw them while still wrapped to help limit drying. Add delicate icing and candies closer to serving time.
✦ Wrapping Up
Conclusion
A Nordic Ware bunny cake pan recipe does not need a long ingredient list or a complicated decorating plan. A simple vanilla cake, careful pan preparation, and the right baking time can make sweet little bunny cakes for Easter brunch, spring parties, or a family dessert. The small details matter most when filling and releasing the cakes, so take your time with the ears, face, and narrow edges.
Choose your recipe based on the pan you own. Small cakelets work well with a basic butter cake or a suitable boxed mix, while a standing 3D bunny needs a firmer cake and careful assembly. Let the cakes cool before decorating, and follow the care instructions for your exact mold so it is ready for the next holiday.
💡 Key Takeaway
Before you start, check the pan model, preheat the oven to the recipe’s stated temperature, and coat every cavity well. Fill no more than three-quarters full unless the exact 3D mold instructions say otherwise, test for doneness, and cool the cakes before turning them out.