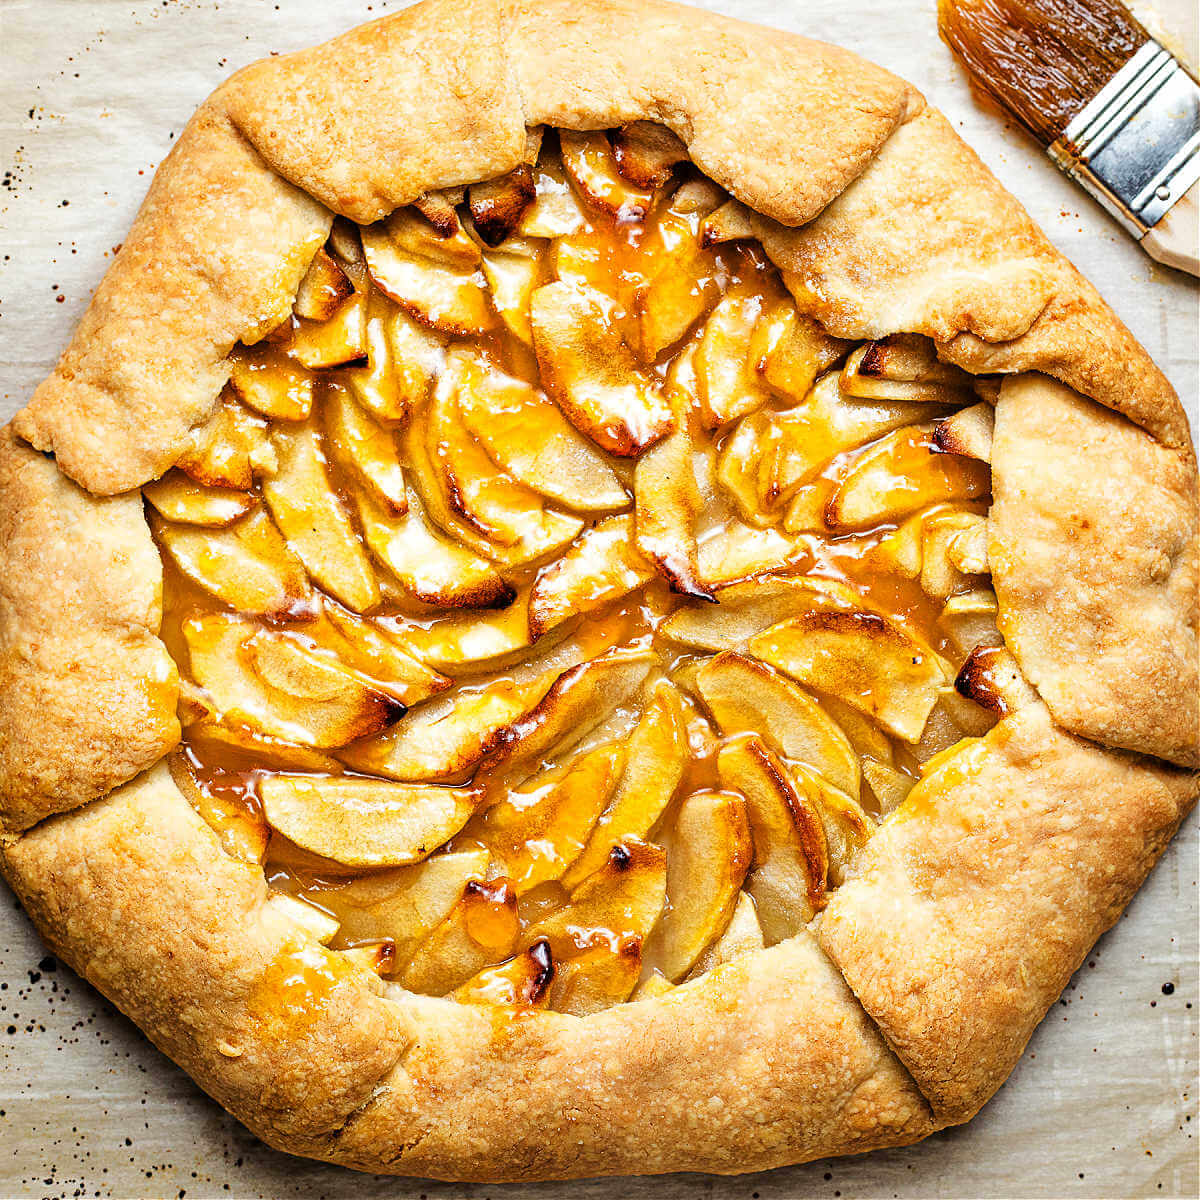
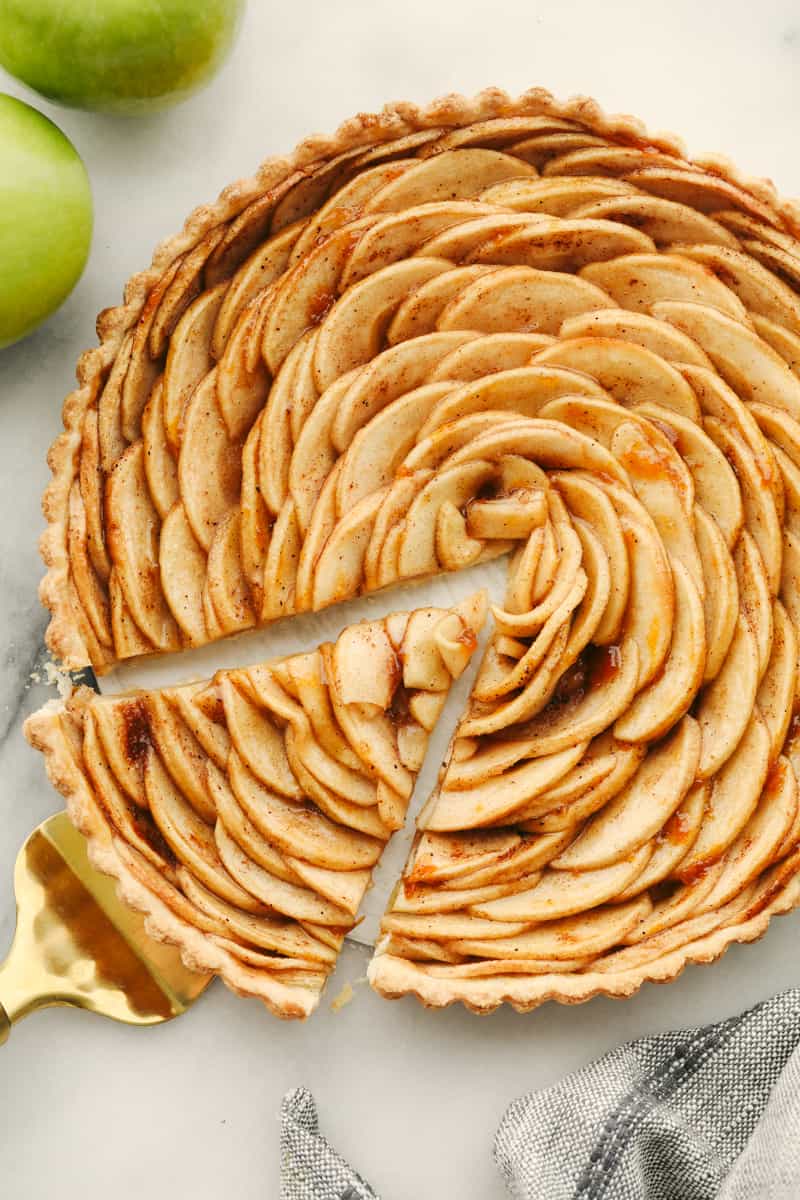
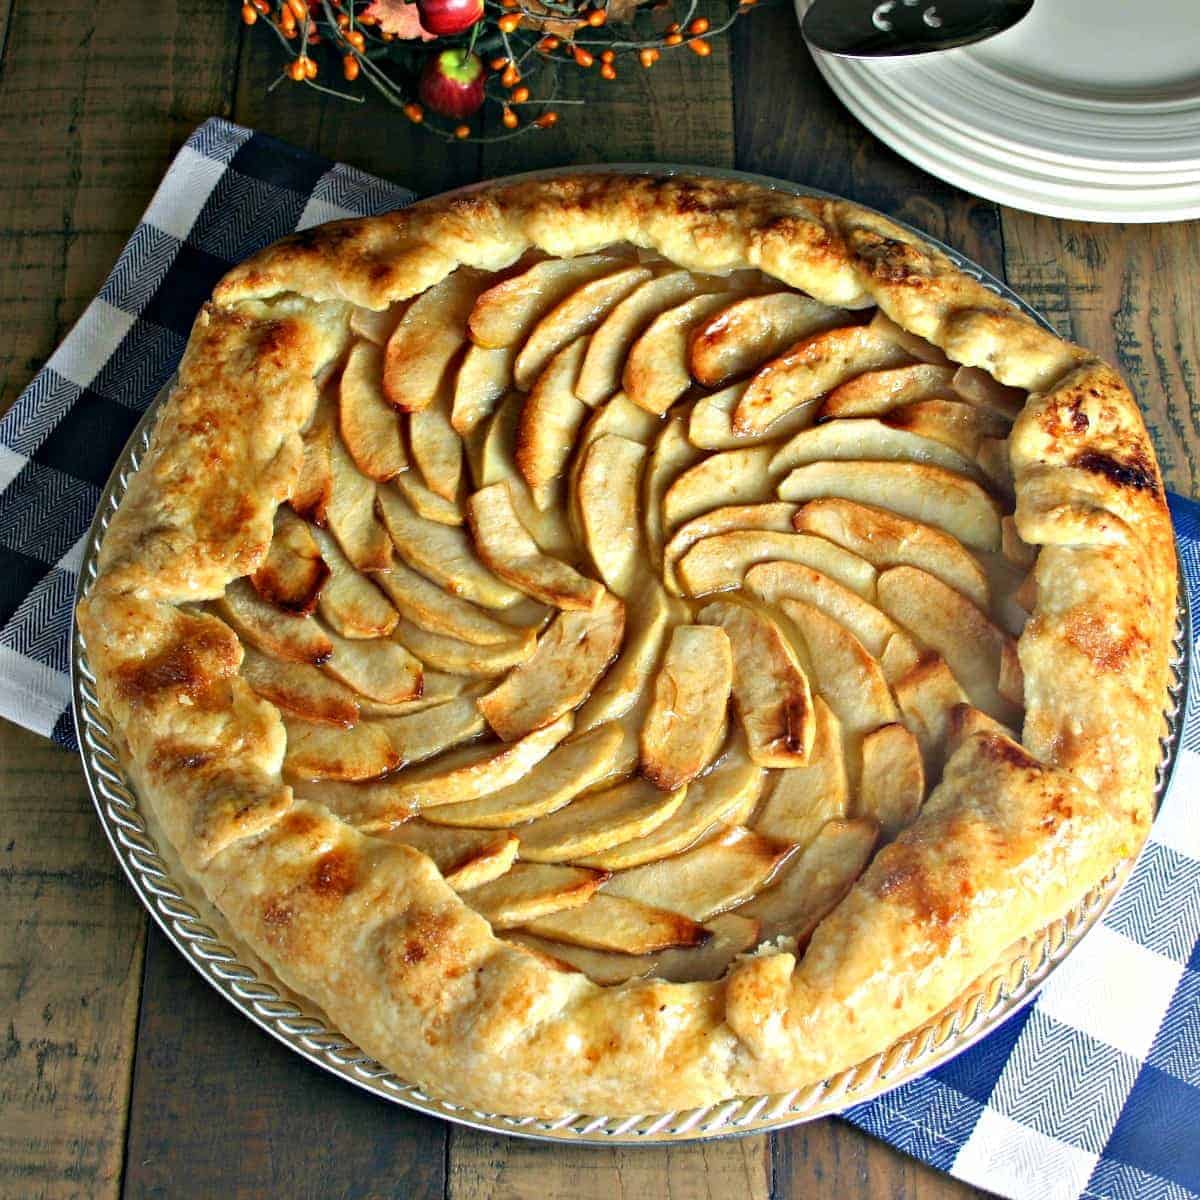
An apple tart made with pie crust is an easy American-style dessert that pairs thinly sliced apples with a flaky crust, sugar, cinnamon, and a little butter. Use a store-bought or homemade pie crust, arrange the apples in a single layer, and bake at 400°F until the fruit is tender and the crust is golden brown.
Across the United States, apple desserts are a familiar sight at family dinners, holiday meals, and weekend bake sales. A homemade apple tart brings that cozy flavor to the table without the work of making a deep, double-crust pie. It uses common baking staples and fresh apples, so you can prepare it even when time is short.
The best part is how easy it is to adapt. A refrigerated pie crust saves time, while a homemade crust gives you more control over flavor and texture. Thin apple slices help the fruit cook at an even pace, and a small amount of lemon juice adds brightness. With a few simple steps, you can make a tart that looks lovely on a dessert plate and tastes just as good the next day.
An apple tart with pie crust gives you the flavor of homemade apple pie with less work. Instead of covering the filling with a second crust, you arrange the apples on one crust or inside a shallow tart shell. The open top lets the fruit brown as it bakes and gives you a clear view of the apple slices.
This recipe suits busy home cooks, new bakers, and anyone who wants a simple dessert without a long list of steps. A store-bought crust cuts down on prep time. You still get to peel, slice, season, and arrange the apples, which gives the finished tart a homemade feel.
The result is a dessert with a crisp edge, soft fruit, and a sweet layer of cinnamon. Serve it after a weeknight meal, bring it to a fall gathering, or pair it with coffee on a quiet afternoon. You can also dress it up with vanilla ice cream for a more special dessert.
Source: www.pinterest.com
Less prep
A ready-made pie crust removes the need to mix, chill, and roll dough from scratch.
Flexible serving
Cut a large tart into wedges for a family dessert or make small tarts for individual servings.
Simple ingredients
Apples, sugar, cinnamon, butter, lemon juice, and pie crust form the base of this recipe.
Apple Tart Versus Apple Pie
An apple pie usually has a deeper dish and may have a top crust that covers the filling. An apple tart is often shallower, with the apples visible on top. This open design allows moisture to escape and makes the fruit part of the presentation.
The terms can overlap in home recipes, especially when a pie crust is used in a tart pan or on a baking sheet. For this recipe, the main goal is a shallow apple dessert with a single crust and an exposed fruit topping.
Choose a tart pan
Use one if you want neat edges and a classic tart shape.
Choose a baking sheet
Use it for a rustic, free-form tart with folded edges.
Ingredients for This Easy Apple Tart
This recipe uses everyday ingredients that are easy to find in a US grocery store. The exact amount of sugar depends on how sweet your apples are, so taste a small piece before you mix the filling. Keep the apple slices thin and close in size to help them cook evenly.
For one 9-inch tart, gather one refrigerated 9-inch pie crust, about three medium apples, two to three tablespoons of granulated sugar, one teaspoon of ground cinnamon, one tablespoon of lemon juice, one tablespoon of melted butter, and one tablespoon of all-purpose flour or cornstarch if the apples look very juicy. A pinch of salt can bring out the fruit’s flavor.
You can add a little brown sugar for a deeper caramel taste or a pinch of nutmeg for extra warmth. These are optional additions, not required ingredients. Keep the filling light so the crust can bake through without becoming soggy.
Source: chefinoz.com
Pie crust
Use a thawed refrigerated crust according to its package directions, or prepare one homemade 9-inch crust.
Apples
Choose firm apples that hold their shape during baking, such as Granny Smith, Honeycrisp, or Braeburn.
Sugar and cinnamon
Start with two tablespoons of sugar and add more only if needed.
Lemon juice
A small amount adds a fresh note and helps keep cut apples from browning as you work.
Butter
Brush a thin layer over the fruit for flavor and better browning.
Which Apples Work Best?
Firm apples are the safest bet for a tart because they soften without turning to mush too quickly. Granny Smith apples give a sharp, tart flavor that balances sugar. Honeycrisp apples offer a sweet-tart taste and a firm bite, while Braeburn apples bring a balanced flavor.
You can mix two apple types to create more depth. For example, pair Granny Smith with Honeycrisp for a balance of tart and sweet. Avoid fruit that feels soft, bruised, or mealy, since it may release excess moisture or lose its shape during baking.
For a tart flavor
Use Granny Smith apples and taste the filling before adding extra sugar.
For a sweeter tart
Use Honeycrisp or another firm, sweet-tart apple.
For a balanced taste
Combine two firm apple varieties in the same tart.
Can You Use Store-Bought Pie Crust?
Yes. Refrigerated pie crust is a practical choice for this recipe. Let it soften just enough to unroll without cracking, but do not leave it warm for too long. Follow the package directions because crust brands can differ in size and handling needs.
If the dough becomes sticky or floppy, place it in the refrigerator for a short time before shaping it. A cold crust is easier to handle and is less likely to tear. If it cracks, press the edges together gently with your fingertips.
Refrigerated crust
Unroll it carefully and fit it into your pan without stretching the dough.
Frozen crust
Thaw it as directed on the package and check whether it is already shaped for a pie plate.
Homemade crust
Chill the dough before rolling it and return it to the refrigerator if it gets too soft.
How to Make Apple Tart With Pie Crust
Set aside about 15 to 20 minutes for prep, then allow roughly 30 to 40 minutes for baking. The total time can change with the thickness of the apples, your pan, and your oven. Preheat the oven to 400°F and place a rack in the center.
Use a clean cutting board and a sharp knife to slice the apples. If you peel them, the filling will have a softer texture. If you keep the skins on, the tart will have more color and a slightly firmer bite. Either method works, so choose the texture you enjoy.
Source: The Recipe Critic
Step 1: Prepare the pan
Lightly grease a 9-inch tart pan or pie plate if its surface needs it. If using a baking sheet, line it with parchment paper.
Step 2: Shape the crust
Fit the pie crust into the pan without pulling or stretching it. Trim extra dough, or fold the edges over for a rustic look.
Step 3: Slice the apples
Remove the cores and cut the apples into slices about one-eighth inch thick. Try to keep them similar in thickness.
Step 4: Season the fruit
Toss the apple slices with lemon juice, sugar, cinnamon, and a pinch of salt. Add the flour or cornstarch if the fruit is very juicy.
Step 5: Arrange the apples
Place the slices in overlapping circles or neat rows. Keep the layer fairly even and avoid piling the fruit too high in the center.
Step 6: Add butter
Brush the melted butter over the apple slices. Use a light hand so the fruit is coated without leaving a pool of fat.
Step 7: Bake the tart
Bake for about 30 to 40 minutes, checking the crust and apples as the tart nears the end of the cooking time.
Step 8: Cool before slicing
Remove the tart when the apples are tender and the crust is golden. Let it rest for at least 20 minutes before cutting.
How to Arrange the Apple Slices
For a classic look, start at the outer edge and overlap the apple slices as you work toward the center. A circular pattern looks neat, but straight rows are easier and taste just as good. Keep the slices close together because apples shrink as they cook.
If the crust is round and the apple slices are uneven, place the smaller pieces near the center. Leave a narrow border around the edge so the crust can brown without being covered by fruit. On a free-form tart, fold the outer dough over the apples and press gently to hold the shape.
For a neat finish
Use slices of similar thickness and overlap them in one even layer.
For a rustic finish
Arrange the fruit loosely and fold the crust edges over the outside.
How to Get a Crisp, Golden Crust
A crisp crust starts with cold dough, a well-heated oven, and control over extra moisture. Apples release juice as they bake, so a thick pile of fruit can leave the center damp. Slice the apples thinly, spread them evenly, and avoid adding more liquid than the recipe needs.
Bake the tart on the center rack so heat can reach the bottom and top at a steady pace. If the crust is still pale near the end, allow a few more minutes in the oven while watching the edges. If the edges brown too quickly, cover them loosely with strips of foil and continue baking until the apples are tender.
Source: Once Upon a Chef
Keep the dough cool
Chill the shaped crust if it becomes warm or soft while you prepare the apples.
Do not overload the filling
A single overlapping layer of apples cooks more evenly than a tall mound.
Check the bottom
If you use a glass pie plate, look for a baked, lightly browned base rather than relying only on the top edge.
Use a baking sheet when helpful
Place the tart pan on a sturdy baking sheet to make it easier to move and catch any drips.
Should You Blind-Bake the Crust?
Blind baking means baking a crust before adding its filling. For a thin apple tart with a moderate amount of fruit, it is often possible to bake the crust and apples together. A very juicy filling or a thick crust may benefit from partial baking first.
If you choose to blind-bake, line the crust with parchment and fill it with pie weights or dry beans made for this purpose. Follow a reliable crust recipe or package directions for the timing, then remove the weights carefully. Add the apples and return the tart to the oven to finish baking.
Bake together
Choose this method for a thin layer of sliced apples and a standard pie crust.
Partially bake first
Consider this method when your crust is thick or your filling tends to release a lot of juice.
Baking Time and Signs the Tart Is Done
Start checking your apple tart at about 30 minutes, but use the crust and fruit as your guide rather than the clock alone. The edges should look golden brown, the base should appear baked rather than wet, and a thin knife should slide into an apple slice with little resistance.
A tart made with thick slices or a deep pan may need more time. A shallow tart with very thin slices may finish sooner. Oven temperatures can vary, so keep an eye on the fruit during the final part of baking and avoid leaving the tart unattended for long stretches.
Source: fity.club
Golden crust
The edges should be browned and firm, not pale and doughy.
Tender apples
A knife should enter the thickest apple slice without a hard crunch.
No watery pool
Some juice is normal, but a large pool in the center can point to excess moisture or underbaking.
Set filling
After cooling, the apple slices should sit neatly on the crust instead of sliding off in a stream of juice.
What If the Apples Brown Before the Crust?
If the fruit is darkening while the crust remains pale, loosely cover the top with foil and keep baking until the base is cooked. The foil reduces direct browning without stopping all heat from reaching the apples.
For your next tart, move the oven rack to the center and check that the oven has fully preheated. If the bottom crust often stays soft, try a metal tart pan or place the tart on a preheated heavy baking sheet. Do not raise the oven temperature sharply to rush the process, since that can burn the fruit before the crust is ready.
Cover the top
Use loose foil if the apples brown too quickly.
Give the base more heat
A metal pan or preheated baking sheet may help the bottom brown more evenly.
Easy Variations and Serving Ideas
Once you know the basic method, you can change the flavor without changing the main steps. A small amount of brown sugar adds a richer note, while a pinch of nutmeg or ground ginger gives the filling more warmth. Keep added spices modest so the apple flavor stays clear.
You can also make a rustic free-form tart on a baking sheet. Lay the crust on parchment, arrange the apples in the center, and fold the edges inward. This shape does not need a perfect circle or a special pan, which makes it useful for casual family meals.
Source: www.pinterest.com
Brown sugar apple tart
Replace some of the granulated sugar with brown sugar for a deeper, molasses-like flavor.
Apple and nutmeg tart
Add a small pinch of nutmeg to the cinnamon for a warm spice note.
Rustic apple tart
Fold the crust edges over part of the filling and leave the center open.
Mini apple tarts
Cut the crust into smaller rounds and use a muffin pan or small tart molds, adjusting the baking time and checking for doneness early.
Glazed apple tart
Brush a thin layer of warmed apple jelly over the baked fruit if you want a light shine.
What Should You Serve With Apple Tart?
Vanilla ice cream is a classic choice because its cool, creamy texture pairs well with warm apples and crisp pastry. Whipped cream is lighter, while plain Greek yogurt gives the dessert a tangy contrast. For a simple snack, serve a small slice with hot coffee, black tea, or a glass of milk.
If you are serving the tart after a large meal, cut modest wedges and let guests add their own toppings. For a holiday table, a small bowl of whipped cream and a scoop of vanilla ice cream let people choose without making the dessert too heavy.
Warm serving
Let the tart cool until it is safe and easy to slice, then serve slightly warm.
Room-temperature serving
Use this option when you want cleaner slices for a buffet or dessert table.
Storage, Make-Ahead Tips, and Common Mistakes
Let the tart cool before storing it. Keep leftovers covered in the refrigerator and use them within three to four days for best quality. For food safety, do not leave perishable food at room temperature for more than two hours, or more than one hour when the temperature is above 90°F.
The crust may soften as the tart sits because the apples continue to release moisture. To bring back some crispness, warm individual slices in an oven or toaster oven until heated through. A microwave works for a quick warm-up, but it will not restore the crust’s crisp texture.
You can slice the apples shortly before assembly and toss them with lemon juice to slow browning. For the best crust, shape the dough close to baking time or keep it chilled until you are ready to fill it. If you need to bake ahead, cool the tart fully and store it covered in the refrigerator.
Source: lifeloveandgoodfood.com
Mistake: using soft apples
Soft fruit can collapse and release more moisture. Start with firm apples that hold their shape.
Mistake: cutting thick slices
Thick slices may stay hard while thin slices brown. Aim for even slices around one-eighth inch thick.
Mistake: adding too much sugar
Extra sugar can draw moisture from the apples. Begin with a modest amount and adjust for the fruit.
Mistake: slicing too soon
The filling needs time to settle. Let the tart rest for at least 20 minutes before cutting.
Mistake: storing it while warm
Trapped steam can soften the crust. Cool the tart before covering and refrigerating it.
Can You Freeze Apple Tart?
You can freeze a baked apple tart, though the crust may lose some crispness after thawing. Cool it fully, wrap it well, and place it in a freezer-safe container. For the best texture, use it within about two months.
Thaw the tart in the refrigerator and warm it in the oven before serving. Avoid leaving it on the counter for hours to thaw. If you are freezing individual portions, separate them with parchment so you can remove only what you need.
Freeze safely
Cool, wrap, label, and freeze the tart promptly after it has reached room temperature.
Reheat for texture
Use an oven rather than a microwave when a crisp crust matters most.
Frequently Asked Questions
Q
Can I make apple tart with a store-bought pie crust?
Yes. A refrigerated or properly thawed frozen pie crust works well. Follow the package directions, fit the dough into your pan without stretching it, and keep it cool until you add the apples. Check the tart as it bakes because crust thickness and pan shape can affect the timing.
Q
Should I peel apples for an apple tart?
Peeling is optional. Peeled apples give the tart a softer, more even texture, while unpeeled apples add color and a slightly firmer bite. Wash the fruit well if you leave the skins on, and remove all cores and seeds before slicing.
Q
How do I stop my apple tart from getting soggy?
Use firm apples, cut even slices, and avoid adding excess liquid. Spread the fruit in a fairly thin layer and bake until the bottom crust is cooked. If your apples release a lot of juice, add a little flour or cornstarch to the filling or consider partially baking the crust before adding the fruit.
Q
What temperature should I use for apple tart?
A good starting point is 400°F for a standard tart made with thin apple slices and a ready-made pie crust. Begin checking around 30 minutes and continue until the crust is golden and the apples are tender. If your crust package or chosen recipe gives different directions, follow those instructions and watch the tart closely.
Q
Can I prepare apple tart the day before serving?
Yes. Bake the tart, let it cool, and store it covered in the refrigerator. Warm it in the oven before serving if you want a crisper crust. You can also prepare the crust and slice the apples ahead, but keep the dough chilled and toss the apples with a little lemon juice to slow browning.
Q
Can I use a frozen pie crust without thawing it?
Check the package instructions first because frozen crusts are sold in different forms. A crust in a disposable pie plate may need a different approach from a rolled dough sheet. Do not force a frozen crust to bend, since it can crack. Thaw it as directed before shaping or filling when the instructions call for it.
✦ Wrapping Up
Conclusion
An apple tart recipe with pie crust is a simple way to make a homemade dessert without spending hours in the kitchen. A ready-made crust, firm apples, cinnamon, and a little sugar are enough to get started. The key is to slice the fruit evenly, keep the dough cool, and bake until the base is golden and the apples are tender.
You can keep the tart plain or add brown sugar, extra spice, or a light fruit glaze. Serve it warm with vanilla ice cream or let it cool for neat slices at a family meal. Store leftovers in the refrigerator and warm them in the oven when you want to bring back some crispness.
💡 Key Takeaway
Preheat the oven to 400°F, gather one 9-inch pie crust and three firm apples, then follow the steps above. Check the tart at 30 minutes and let it rest for at least 20 minutes before slicing.